
"2024 Approved Cinematic Perfection Mastering the Top 5 Techniques"
Cinematic Perfection: Mastering the Top 5 Techniques
Do you want to experience top-tier cinematic effects but are low on budget? Unfortunately, professional high-quality cinematic effects require expensive gadgets that cost a lot of money. Of course, everyone wants to create the best cinematic shots, but spending a lot of money for TikTok or Facebook views is not a good idea.
You can use common household items to uplift the quality of your videos. But how to use these tricks to get great cinematic shots? Don’t worry; this article will guide you about using top cinematic/camera tips to boost your video-making experience. We are starting with the smooth camera movement.
Tip 1. Smooth Camera Movement
Smooth camera movement is the most basic and vital part of the video-making process. Expensive equipment is used to get smooth camera movements on a professional level.
Still, if you are on a budget, you can use some everyday household objects to get a smooth camera shot. Follow the steps below to get a smooth cinematic video using your phone and duct tape only.
Steps
Step 1 Attach your phone to the side of a door using duct tape or any strong tape that can hold your phone and not let it fall.
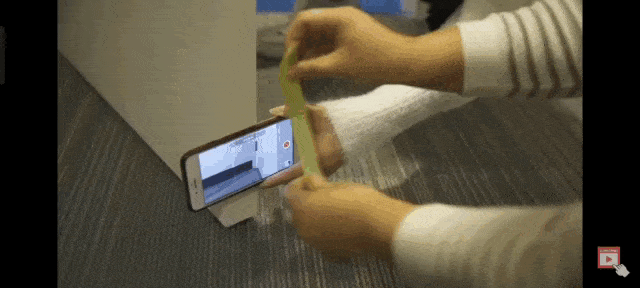
Step 2 Now open and close the door to get smooth camera movement.
Tip 2. DIY Light Focus and Control
Shaping light is a crucial component of filmmaking, requiring command over creating and guiding shadows. You need to focus the light on the subjects rather than the background. Use the following methods to focus light on the point of interest.
DIY LED Panel
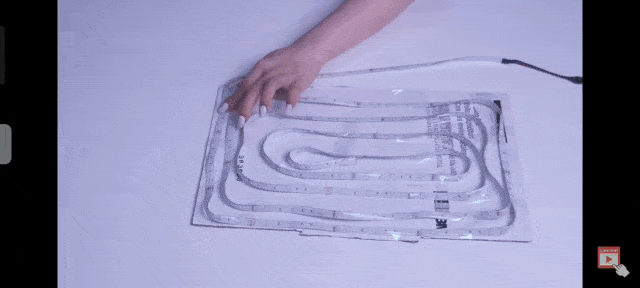
You can create LED Panel at home to add light to a subject. Unfortunately, LED strips do not produce bright light when spread as a straight line. However, we can use cardboard and LED light strips to build a broader, more brilliant light. Follow the steps below to make DIY LED Panel.
Steps
Step 1 Take a cardboard and an LED strip.
Step 2 Using glue or tape, stick the LED light strip on the cardboard in a spiral shape.
Step 3 Make sure the gap between each spiral is uniform.
Step 4 Plug in the LED strip and use this LED Panel for a broader light source.
Alright! Let’s check out how it looks in the video below.

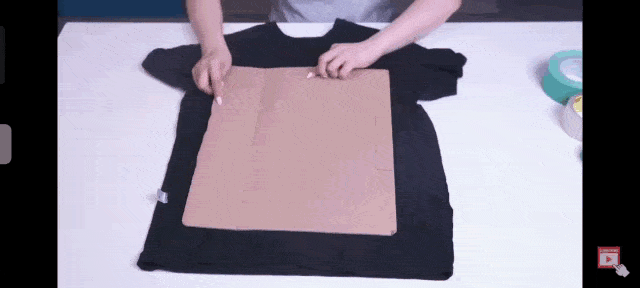
DIY Light Flag
Black color does not reflect light, so a black fabric can be used to make a DIY Light Flag. Here is a step-by-step guide to creating a light flag at home.
Steps
Step 1 Take a black t-shirt and cardboard.
Step 2 Wrap the t-shirt around the cardboard.
Step 3 Use tape to secure the t-shirt so it is firmly attached to cardboard.
Step 4 Now, use this DIY Light Flag to shape or block light while filming.
Let us see how it looks;
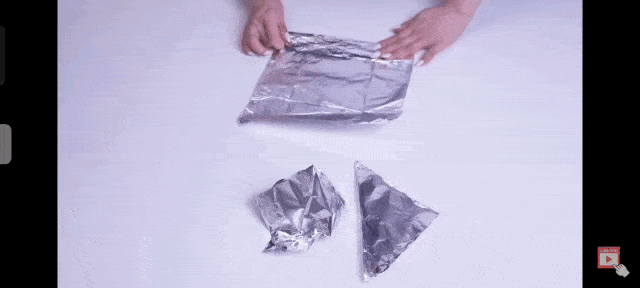
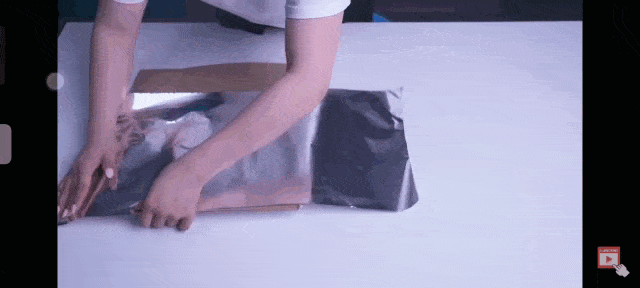
DIY Black Wrap
A black wrap is made of aluminum, so you can use aluminum foils to make black wrap at your home. Black wraps are used to shape and block light during filmmaking.
Follow these steps to make a black wrap to focus light on a smaller area.
Steps
Step 1 Take an LED bulb and aluminum foil.
Step 2 Wrap the foil around the bulb
Step 3 Don’t cover the base of the bulb with aluminum foil.
Step 4 Do not cover the top part of the bulb, as from here, and the light will come out.
Step 5 Put the bulb on the lamp and turn it on the lamp.
Here is a GIF attached for a better understanding of the steps.
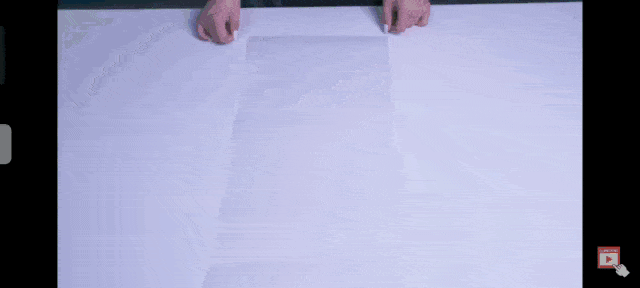
DIY Light Reflector
A reflector is a piece of glass or any reflective surface that can redirect light to a specific spot. For example, use aluminum foil to make a Light Reflector at your home.
Follow the steps to make Light Reflector at almost zero cost.
Steps
Step 1 Take cardboard and aluminum foil.
Step 2 Wrap the aluminum foil around the cardboard smoothly. A smooth surface reflects light better.
Step 3 Use the reflector to redirect light to your object.
There is a GIF attached below to understand the steps visually.

Tip 3. DIY Light Diffuser
In professional productions, light diffusers are frequently used to soften, level out the lighting, and lessen the harshness of shadows.
Diffuse Lights With a Desk Mat
You can diffuse the light using a transparent desk mat if you think there is too much light.
Follow the steps below to create a light diffuser using a desk mat at home.
Steps
Step 1 Take LED Panel and transparent desk mat.
Step 2 Cover the LED Panel with the transparent desk mat.
Step 3 Use this diffuser to reduce the intensity of light.
For a better understanding of the steps, watch the GIF attached below.
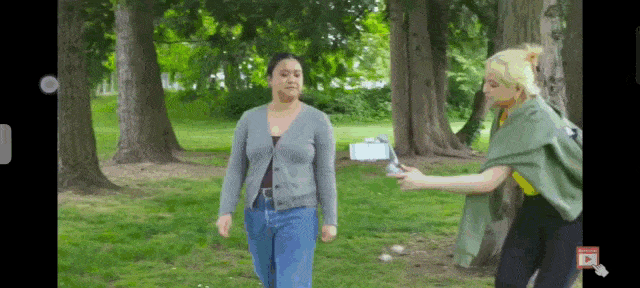
Tip 4. Reveal Movement and 180° Presentation
The most commonly used cinematic movements are the reveal and 180° presentation movements. A gimbal is needed to record these movements.
Reveal Movement
It is the most famous cinematic Movement used these days. So let’s discuss how you can record reveal movement using your phone and a gimbal.
Steps
Step 1 Make sure to have a subject in the foreground
Step 2 Start slowly by lifting the gimbal from low to high in front of the subject.
Step 3 Reveal the main subject.
Step 4 Locking mode is best for recording reveal movement shots.
Here is a video showing how to record reveal movement.

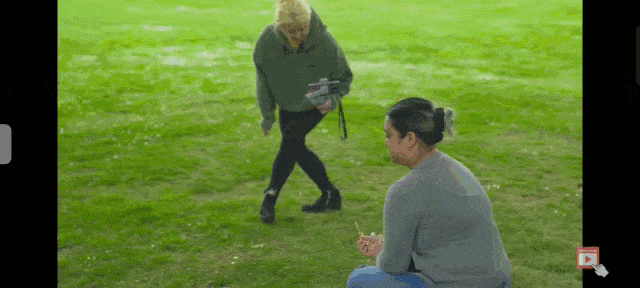
180° Presentation Movement
This Movement gives the subject a general look and displays more details of the surroundings and the subject.
Follow these steps to record a 180° presentation video.
Steps
Step 1 Set your phone on a gimbal.
Step 2 Stand on one side of the subject.
Step 3 Move slowly to the other side of the subject while recording.
A sample video attached below shows how to record 180 presentation movements.
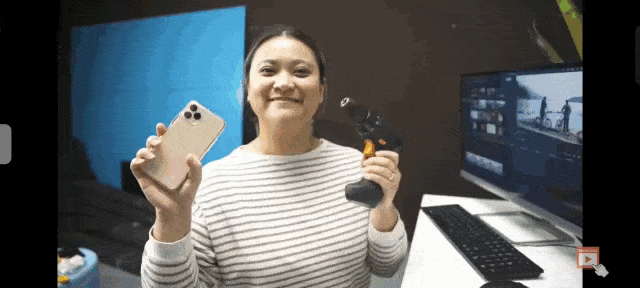
Tip 5. Create a Barrel Roll Shot
A barrel roll shot is one of the most advanced and creative camera movements. A gimbal is required to produce a Barrel roll shot. But you can use a power drill and your phone to record this Movement.
The steps to record Barrel roll movement are as follows.
Steps
Step 1 Take a power drill, duct tape, and your phone.
Step 2 Attach the back side of your phone to the power drill using duct tape.
Step 3 Make sure the phone is firmly attached and does not fall off.
Step 4 Turn on the power drill at low speed and record the barrel roll shot.
The video attached below will help you to understand these steps.
Final Words
No doubt, professional cinematography requires expensive equipment, but if you are low on budget, you can use different household items to create cinematic effects. You are using everyday gadgets for creating videos significantly reduces the cost.
After filming the videos, edit them using Wondershare Filmora to add unique transitions and effects. This way, you create and edit the best cinematic shots at your home and post them on social media platforms. Share this article with your friends if these tips and tricks are exciting and helpful and if you have any queries, let us know.
Free Download For Win 7 or later(64-bit)
Free Download For macOS 10.14 or later
Free Download For macOS 10.14 or later
- Title: 2024 Approved Cinematic Perfection Mastering the Top 5 Techniques
- Author: Mark
- Created at : 2024-07-26 19:44:59
- Updated at : 2024-07-27 19:44:59
- Link: https://extra-lessons.techidaily.com/2024-approved-cinematic-perfection-mastering-the-top-5-techniques/
- License: This work is licensed under CC BY-NC-SA 4.0.