
A Complete Overview of VSCO Photo Editor
A Complete Overview of VSCO Photo Editor
Not every captured picture is perfect and captivating for the viewers. That’s why professionals rely on the powerful photo and video editors to get rid of blemishes and flaws with a few clicks. A reliable photo editor should comprise natural effects and tools that can easily make any photo alluring. It’s relatable, right?
In this article, we will discuss a similar reliable photo editor known as the VSCO Photo Editor, along with its descriptive key features. Let’s get started!
In this article
01 Key Features of VSCO Photo Editor
02 10 Helpful Tips to Use VSCO Photo Editor
Part 1: Key Features of VSCO Photo Editor
VSCO Photo Editor has come across as a reliable yet advanced photo editing tool that many youngsters use nowadays. This app is highly compatible with Android and iOS smartphones and runs perfectly at the fastest speed possible. For mobile phone users, you can instantly edit your image through this platform and upload it to various platforms. Isn’t it great?
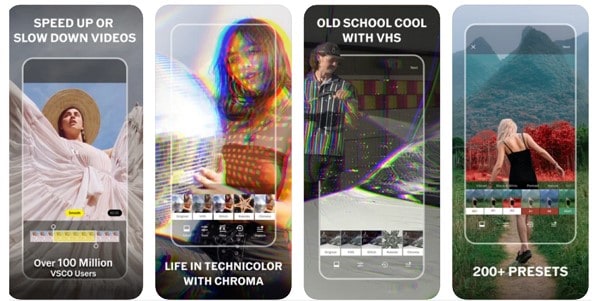
The best thing about this app is that you can view suggested edited photos after creating your account in this tool. You can explore diverse genres of pictures through this app that many people have shared across the globe. You can also search for the type of images you want to explore and can get instant inspiration. It displays various categories on its home page and also features trending images that are immensely appreciated.
To know about VSCO Photo Editor in detail, let’s shed light on their key features that can bring your desiring results:
1. Presets
The presets of VSCO edits contain amazing and vibrant filters that can be applied to your photos to make them eye-catchy. Their presets comprise different categories such as featured, popular, and favorites. In the featured category, you will get filters that will be suitable and appropriate for your photo, and you can also choose trendy filters from the categories of favorites and popular. That is perfect!

company, user or members of the same household. Action! - screen and game recorder</a>
2. Dodge and Bun
Dodge and burn is another fantastic feature of the VSCO Photo Editor, through which you can adjust and manipulate certain areas by controlling their exposure. This technique is widely used in mainstream photography and generates professional results by giving attention to details. It surely sounds amazing.
 WonderFox DVD Ripper Pro
3. Skin Tone
Do you want to manage the skin tone of the characters present in your picture? Use the feature of skin tone provided by this tool to enhance, dim, and adjust the skin tone naturally with a single click. This feature is mostly applied in enhancing selfie portraits by adjusting the skin color accordingly. It deserves applause!
4. Borders
Borders on photos add a creative touch and set a new perception for the audience. After capturing the photo, you can apply various borders such as white or black borders and can give a new dimension to your image. A suitable border will effortlessly provide a professional touch instantly.

5. Highlight and Fade
Fading and highlighting the images are widely applied techniques to tell the genre of the captured image. For instance, you can fade the picture to give it a vintage look, and similarly, you can highlight certain parts of a photo to make it more vibrant and modern. Do you wish to use it?

Part 2: 10 Helpful Tips to Use VSCO Photo Editor
In this section, we will enlist 10 helpful tips through which you can build amazing VSCO edits without wasting your time unnecessarily. Are you seeking a similar thing? Read the following tips carefully and get ready to share alluring images with the world:
1. Makes Adjustments
Before starting with editing your picture, the first rule is to crop the picture by making appropriate pictures. Make sure that the angle of your photo is correct and straight by removing the unwanted edges and objects from the frame. Your subject should be at the center so that it can instantly catch a viewer’s attention. You can do this entire process manually or automatically on the VSCO Photo Editor.
 Nero Burning ROM:
The ultimate burning program for all your needs!

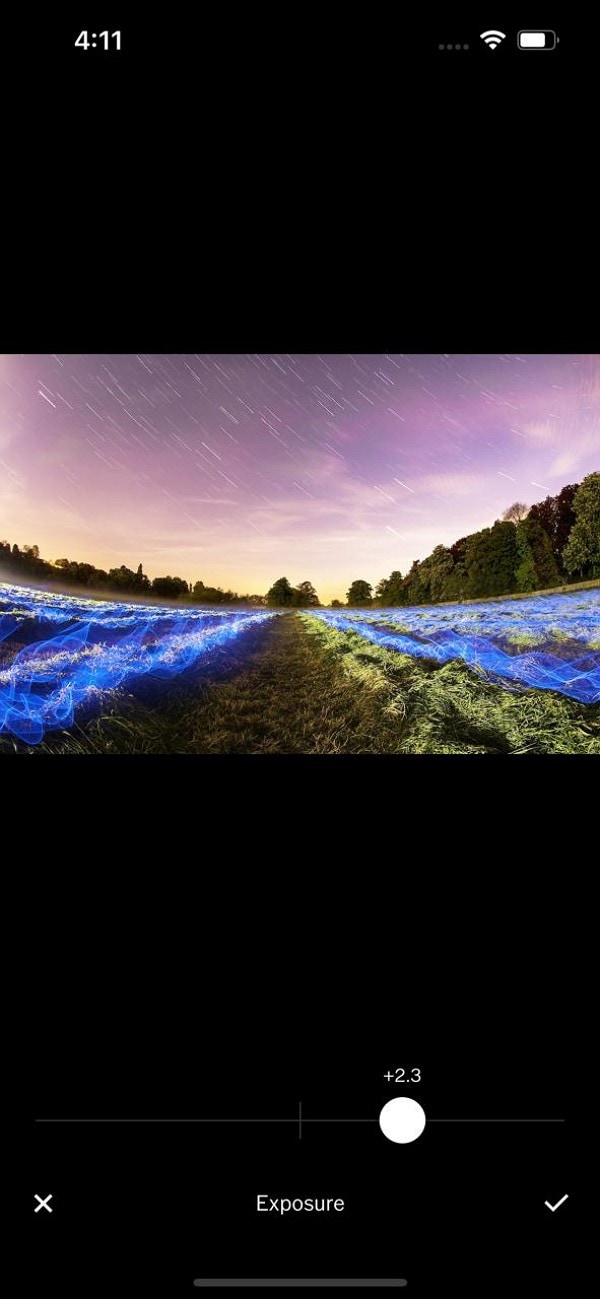
2. Control the Light Exposure
Light exposure is the other significant element of the picture as a perfect light exposure draws attention and seems pleasant to the eyes. Many times, individuals capture photos in daylight or in a room where the light exposure is minimum. If your subject is not illuminated perfectly, you can effectively control the light exposure through the VSCO Photo Editor.
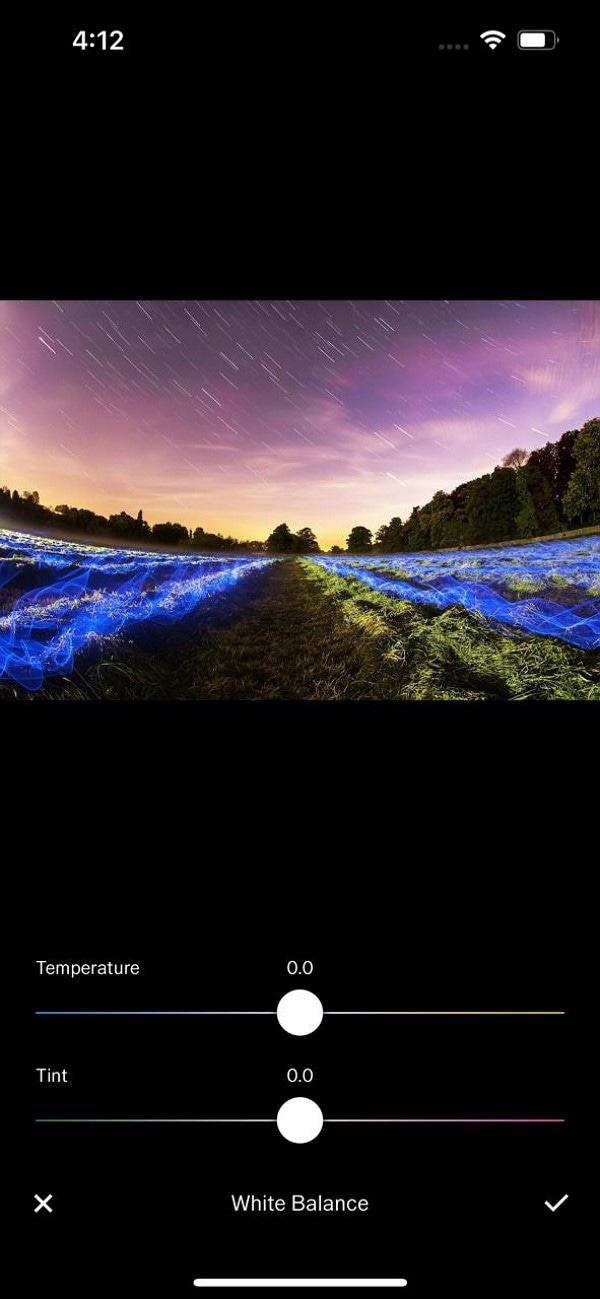
3. Adjust the White Balance
White balancing is another technique through which you can enhance the colors present in your picture. VSCO Photo Editor has this advanced function through which you can increase the temperature of the image by highlighting the colors, or you can add a tint to make the colors softer.
4. Make Skin Tone Natural
Are you annoyed due to your unnatural skin color in the selfie? Try VSCO Photo Editor to adjust your skin tone with a single click. Your skin tone in the captured image depends on the light exposure. So, if you have captured your selfie in dim light, make your skin color natural and bright with the VSCO Photo Editor.
 PDF application, powered by AI-based OCR, for unified workflows with both digital and scanned documents.
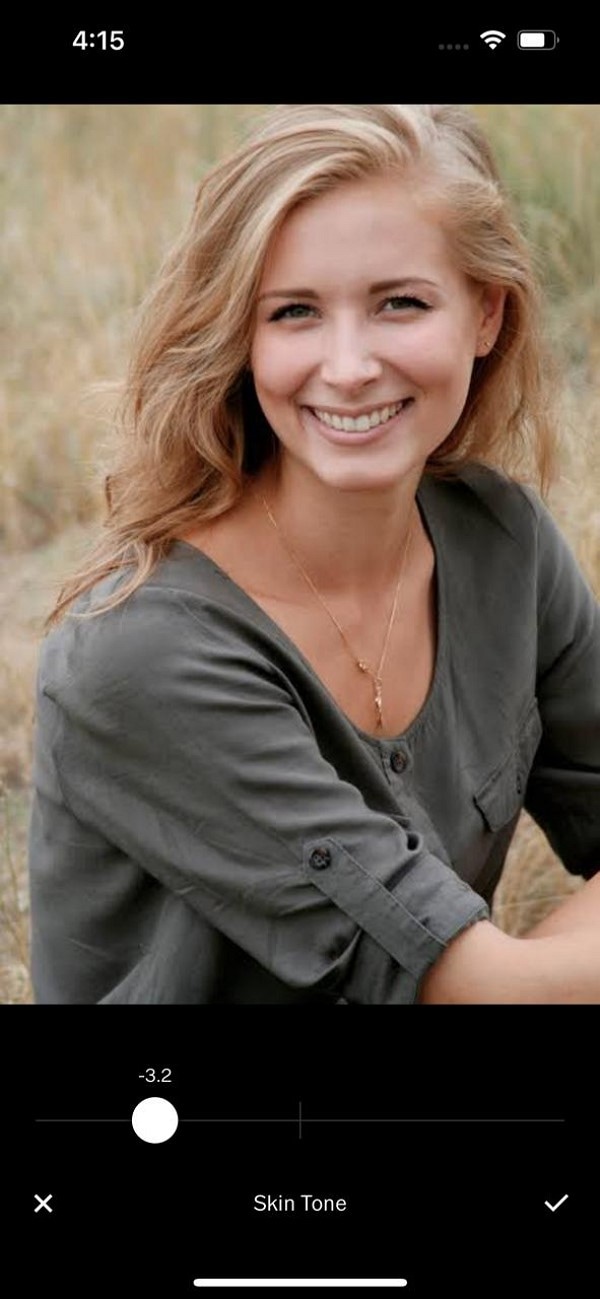
 Glarysoft File Recovery Pro - Helps to recover your lost file/data, even permanently deleted data.
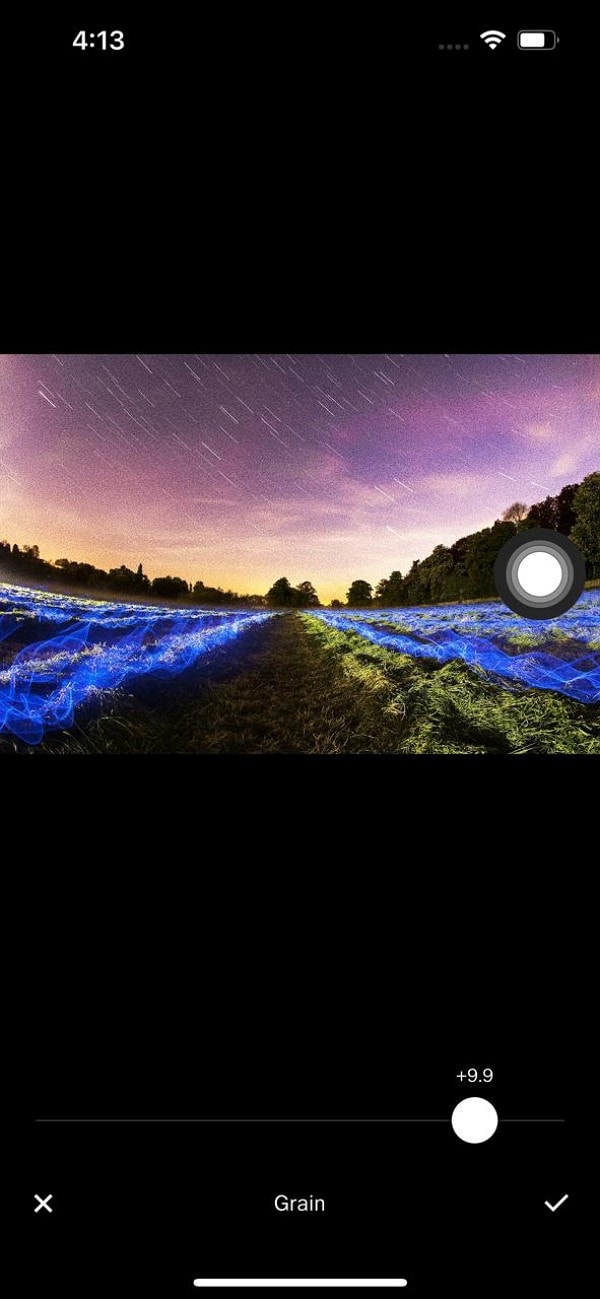
5. Add Grains for a Vintage Look
Vintage pictures have their own uniqueness and charm that attracts the viewer’s attention instantly. By adding grains from this editor, you can easily give the picture a vintage touch with a single click. For example, if you have captured a picture of a historic building, you can add grains to it to make it more captivating.
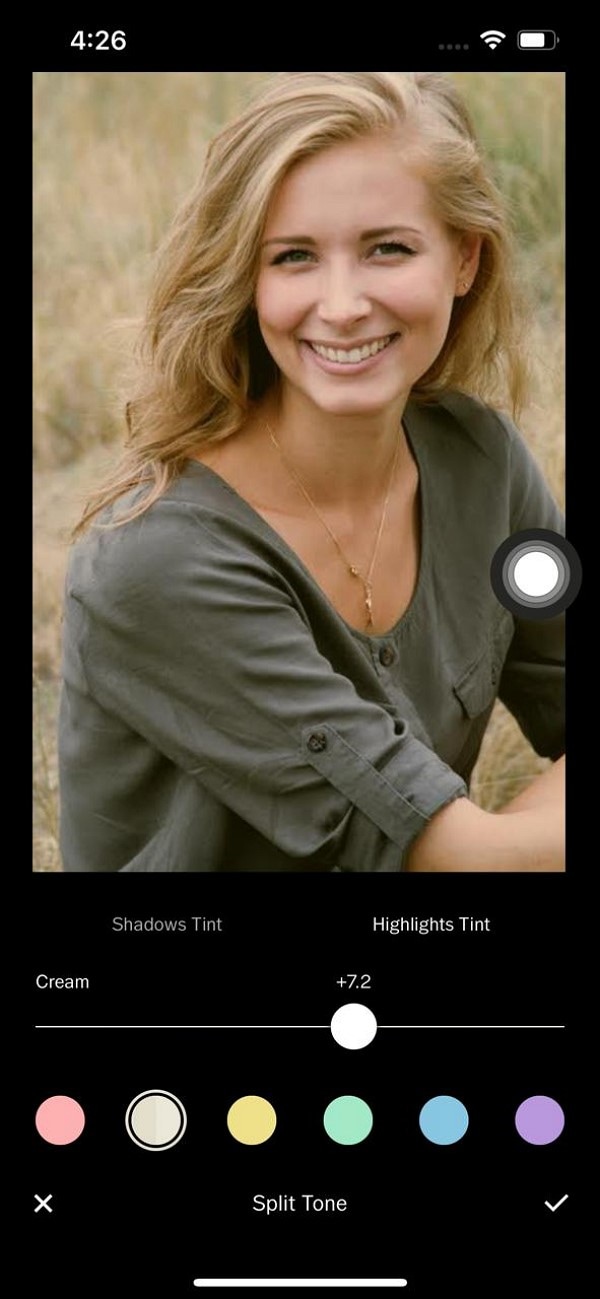
6. Split the Tone
Do you want to give your picture a vibrant look? Use the exclusive feature of “Split Tone” by VSCO Photo Editor to add two colors to the shadows and highlights of your picture. You can create a contemporary image with more vibrant shadows and highlights through this option.
7. Control the Saturation
Saturation in photography means controlling the sharpness and intensity of the colors. If you have captured a faded color photo, you increase its intensity by enhancing its saturation. As a result, the human eye will automatically give attention to the color details in your picture.
 Forex Robotron Gold Package
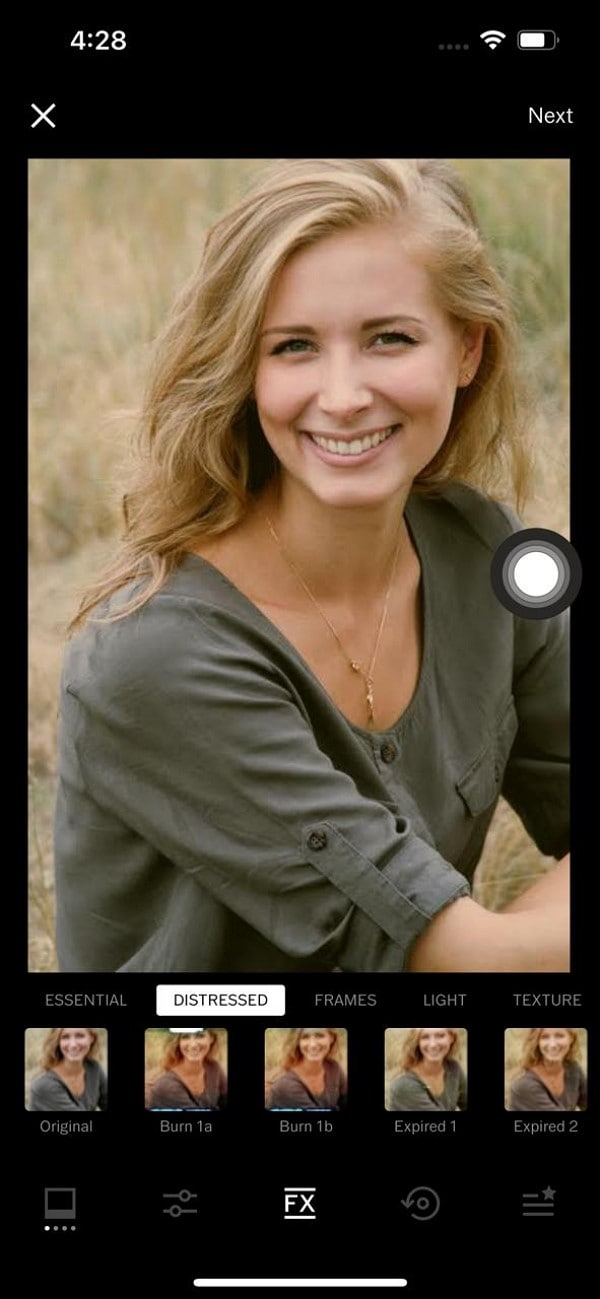
8. Adjust the Intensity of Filters
Filters are the best thing present in every photo editor. However, VSCO edits are different than any ordinary photo editor as it gives the option to control the intensity of your picture in each filter. Thus, you can add layers of filters to your image and adjust their intensity according to your will.

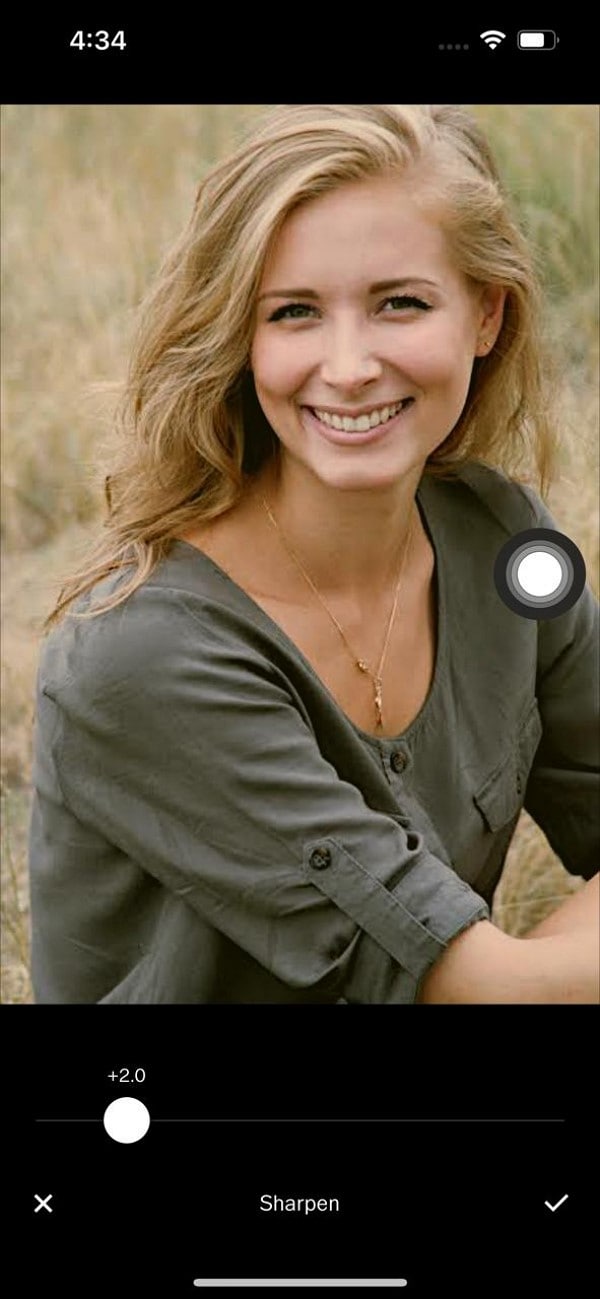
9. Sharpen the Edges
Another tip to make the features, props, or background look catchier is to sharpen them through this editor. By sharpening the image, you can illustrate the picture more clearly to the audience.
10. Add Text to Describe
Who does not like to add text to photos to post a story on social media accounts? Through VSCO, you can add text boxes to your images and add exciting phrases to post on social media platforms. You can select fonts and colors through this editor.
Conclusion
People rely on photo editors to generate captivating results and describe the emotion in an ordinary picture. For your ease, we have described the VSCO Photo Editor in length along with its distinct features. Are you satisfied? We recommend this particular editor due to its unique filters and professional editing tools. Get started with it, and wish for the best results!
02 10 Helpful Tips to Use VSCO Photo Editor
Part 1: Key Features of VSCO Photo Editor
VSCO Photo Editor has come across as a reliable yet advanced photo editing tool that many youngsters use nowadays. This app is highly compatible with Android and iOS smartphones and runs perfectly at the fastest speed possible. For mobile phone users, you can instantly edit your image through this platform and upload it to various platforms. Isn’t it great?

The best thing about this app is that you can view suggested edited photos after creating your account in this tool. You can explore diverse genres of pictures through this app that many people have shared across the globe. You can also search for the type of images you want to explore and can get instant inspiration. It displays various categories on its home page and also features trending images that are immensely appreciated.
To know about VSCO Photo Editor in detail, let’s shed light on their key features that can bring your desiring results:
1. Presets
The presets of VSCO edits contain amazing and vibrant filters that can be applied to your photos to make them eye-catchy. Their presets comprise different categories such as featured, popular, and favorites. In the featured category, you will get filters that will be suitable and appropriate for your photo, and you can also choose trendy filters from the categories of favorites and popular. That is perfect!
2. Dodge and Bun
Dodge and burn is another fantastic feature of the VSCO Photo Editor, through which you can adjust and manipulate certain areas by controlling their exposure. This technique is widely used in mainstream photography and generates professional results by giving attention to details. It surely sounds amazing.
3. Skin Tone
Do you want to manage the skin tone of the characters present in your picture? Use the feature of skin tone provided by this tool to enhance, dim, and adjust the skin tone naturally with a single click. This feature is mostly applied in enhancing selfie portraits by adjusting the skin color accordingly. It deserves applause!

4. Borders
Borders on photos add a creative touch and set a new perception for the audience. After capturing the photo, you can apply various borders such as white or black borders and can give a new dimension to your image. A suitable border will effortlessly provide a professional touch instantly.
5. Highlight and Fade
Fading and highlighting the images are widely applied techniques to tell the genre of the captured image. For instance, you can fade the picture to give it a vintage look, and similarly, you can highlight certain parts of a photo to make it more vibrant and modern. Do you wish to use it?
Part 2: 10 Helpful Tips to Use VSCO Photo Editor
In this section, we will enlist 10 helpful tips through which you can build amazing VSCO edits without wasting your time unnecessarily. Are you seeking a similar thing? Read the following tips carefully and get ready to share alluring images with the world:
1. Makes Adjustments
Before starting with editing your picture, the first rule is to crop the picture by making appropriate pictures. Make sure that the angle of your photo is correct and straight by removing the unwanted edges and objects from the frame. Your subject should be at the center so that it can instantly catch a viewer’s attention. You can do this entire process manually or automatically on the VSCO Photo Editor.

2. Control the Light Exposure
Light exposure is the other significant element of the picture as a perfect light exposure draws attention and seems pleasant to the eyes. Many times, individuals capture photos in daylight or in a room where the light exposure is minimum. If your subject is not illuminated perfectly, you can effectively control the light exposure through the VSCO Photo Editor.
3. Adjust the White Balance
White balancing is another technique through which you can enhance the colors present in your picture. VSCO Photo Editor has this advanced function through which you can increase the temperature of the image by highlighting the colors, or you can add a tint to make the colors softer.
4. Make Skin Tone Natural
Are you annoyed due to your unnatural skin color in the selfie? Try VSCO Photo Editor to adjust your skin tone with a single click. Your skin tone in the captured image depends on the light exposure. So, if you have captured your selfie in dim light, make your skin color natural and bright with the VSCO Photo Editor.
 Epubor Audible Converter for Win: Download and convert Audible AAXC/AA/AAX to MP3 with 100% original quality preserved.
5. Add Grains for a Vintage Look
Vintage pictures have their own uniqueness and charm that attracts the viewer’s attention instantly. By adding grains from this editor, you can easily give the picture a vintage touch with a single click. For example, if you have captured a picture of a historic building, you can add grains to it to make it more captivating.
![]() FX PRO (Gold Robot + Silver Robot(Basic Package))
FX PRO (Gold Robot + Silver Robot(Basic Package))
6. Split the Tone
Do you want to give your picture a vibrant look? Use the exclusive feature of “Split Tone” by VSCO Photo Editor to add two colors to the shadows and highlights of your picture. You can create a contemporary image with more vibrant shadows and highlights through this option.
7. Control the Saturation
Saturation in photography means controlling the sharpness and intensity of the colors. If you have captured a faded color photo, you increase its intensity by enhancing its saturation. As a result, the human eye will automatically give attention to the color details in your picture.

 ZoneAlarm Pro Antivirus + Firewall NextGen
8. Adjust the Intensity of Filters
Filters are the best thing present in every photo editor. However, VSCO edits are different than any ordinary photo editor as it gives the option to control the intensity of your picture in each filter. Thus, you can add layers of filters to your image and adjust their intensity according to your will.
 Any DRM Removal for Mac: Remove DRM from Adobe, Kindle, Sony eReader, Kobo, etc, read your ebooks anywhere.
9. Sharpen the Edges
Another tip to make the features, props, or background look catchier is to sharpen them through this editor. By sharpening the image, you can illustrate the picture more clearly to the audience.

10. Add Text to Describe
Who does not like to add text to photos to post a story on social media accounts? Through VSCO, you can add text boxes to your images and add exciting phrases to post on social media platforms. You can select fonts and colors through this editor.

Conclusion
People rely on photo editors to generate captivating results and describe the emotion in an ordinary picture. For your ease, we have described the VSCO Photo Editor in length along with its distinct features. Are you satisfied? We recommend this particular editor due to its unique filters and professional editing tools. Get started with it, and wish for the best results!
02 10 Helpful Tips to Use VSCO Photo Editor
Part 1: Key Features of VSCO Photo Editor
VSCO Photo Editor has come across as a reliable yet advanced photo editing tool that many youngsters use nowadays. This app is highly compatible with Android and iOS smartphones and runs perfectly at the fastest speed possible. For mobile phone users, you can instantly edit your image through this platform and upload it to various platforms. Isn’t it great?
The best thing about this app is that you can view suggested edited photos after creating your account in this tool. You can explore diverse genres of pictures through this app that many people have shared across the globe. You can also search for the type of images you want to explore and can get instant inspiration. It displays various categories on its home page and also features trending images that are immensely appreciated.
To know about VSCO Photo Editor in detail, let’s shed light on their key features that can bring your desiring results:
1. Presets
The presets of VSCO edits contain amazing and vibrant filters that can be applied to your photos to make them eye-catchy. Their presets comprise different categories such as featured, popular, and favorites. In the featured category, you will get filters that will be suitable and appropriate for your photo, and you can also choose trendy filters from the categories of favorites and popular. That is perfect!
### 2\. Dodge and BunDodge and burn is another fantastic feature of the VSCO Photo Editor, through which you can adjust and manipulate certain areas by controlling their exposure. This technique is widely used in mainstream photography and generates professional results by giving attention to details. It surely sounds amazing.
3. Skin Tone
Do you want to manage the skin tone of the characters present in your picture? Use the feature of skin tone provided by this tool to enhance, dim, and adjust the skin tone naturally with a single click. This feature is mostly applied in enhancing selfie portraits by adjusting the skin color accordingly. It deserves applause!
4. Borders
Borders on photos add a creative touch and set a new perception for the audience. After capturing the photo, you can apply various borders such as white or black borders and can give a new dimension to your image. A suitable border will effortlessly provide a professional touch instantly.
5. Highlight and Fade
Fading and highlighting the images are widely applied techniques to tell the genre of the captured image. For instance, you can fade the picture to give it a vintage look, and similarly, you can highlight certain parts of a photo to make it more vibrant and modern. Do you wish to use it?

Part 2: 10 Helpful Tips to Use VSCO Photo Editor
In this section, we will enlist 10 helpful tips through which you can build amazing VSCO edits without wasting your time unnecessarily. Are you seeking a similar thing? Read the following tips carefully and get ready to share alluring images with the world:
1. Makes Adjustments
Before starting with editing your picture, the first rule is to crop the picture by making appropriate pictures. Make sure that the angle of your photo is correct and straight by removing the unwanted edges and objects from the frame. Your subject should be at the center so that it can instantly catch a viewer’s attention. You can do this entire process manually or automatically on the VSCO Photo Editor.
2. Control the Light Exposure
Light exposure is the other significant element of the picture as a perfect light exposure draws attention and seems pleasant to the eyes. Many times, individuals capture photos in daylight or in a room where the light exposure is minimum. If your subject is not illuminated perfectly, you can effectively control the light exposure through the VSCO Photo Editor.
 PDF application, powered by AI-based OCR, for unified workflows with both digital and scanned documents.
3. Adjust the White Balance
White balancing is another technique through which you can enhance the colors present in your picture. VSCO Photo Editor has this advanced function through which you can increase the temperature of the image by highlighting the colors, or you can add a tint to make the colors softer.
4. Make Skin Tone Natural
Are you annoyed due to your unnatural skin color in the selfie? Try VSCO Photo Editor to adjust your skin tone with a single click. Your skin tone in the captured image depends on the light exposure. So, if you have captured your selfie in dim light, make your skin color natural and bright with the VSCO Photo Editor.
5. Add Grains for a Vintage Look
Vintage pictures have their own uniqueness and charm that attracts the viewer’s attention instantly. By adding grains from this editor, you can easily give the picture a vintage touch with a single click. For example, if you have captured a picture of a historic building, you can add grains to it to make it more captivating.
6. Split the Tone
Do you want to give your picture a vibrant look? Use the exclusive feature of “Split Tone” by VSCO Photo Editor to add two colors to the shadows and highlights of your picture. You can create a contemporary image with more vibrant shadows and highlights through this option.
7. Control the Saturation
Saturation in photography means controlling the sharpness and intensity of the colors. If you have captured a faded color photo, you increase its intensity by enhancing its saturation. As a result, the human eye will automatically give attention to the color details in your picture.
8. Adjust the Intensity of Filters
Filters are the best thing present in every photo editor. However, VSCO edits are different than any ordinary photo editor as it gives the option to control the intensity of your picture in each filter. Thus, you can add layers of filters to your image and adjust their intensity according to your will.

WPS Office Premium ( File Recovery, Photo Scanning, Convert PDF)–Yearly
9. Sharpen the Edges
Another tip to make the features, props, or background look catchier is to sharpen them through this editor. By sharpening the image, you can illustrate the picture more clearly to the audience.
10. Add Text to Describe
Who does not like to add text to photos to post a story on social media accounts? Through VSCO, you can add text boxes to your images and add exciting phrases to post on social media platforms. You can select fonts and colors through this editor.

Conclusion
People rely on photo editors to generate captivating results and describe the emotion in an ordinary picture. For your ease, we have described the VSCO Photo Editor in length along with its distinct features. Are you satisfied? We recommend this particular editor due to its unique filters and professional editing tools. Get started with it, and wish for the best results!
02 10 Helpful Tips to Use VSCO Photo Editor
Part 1: Key Features of VSCO Photo Editor
VSCO Photo Editor has come across as a reliable yet advanced photo editing tool that many youngsters use nowadays. This app is highly compatible with Android and iOS smartphones and runs perfectly at the fastest speed possible. For mobile phone users, you can instantly edit your image through this platform and upload it to various platforms. Isn’t it great?
The best thing about this app is that you can view suggested edited photos after creating your account in this tool. You can explore diverse genres of pictures through this app that many people have shared across the globe. You can also search for the type of images you want to explore and can get instant inspiration. It displays various categories on its home page and also features trending images that are immensely appreciated.
To know about VSCO Photo Editor in detail, let’s shed light on their key features that can bring your desiring results:
1. Presets
The presets of VSCO edits contain amazing and vibrant filters that can be applied to your photos to make them eye-catchy. Their presets comprise different categories such as featured, popular, and favorites. In the featured category, you will get filters that will be suitable and appropriate for your photo, and you can also choose trendy filters from the categories of favorites and popular. That is perfect!
2. Dodge and Bun
Dodge and burn is another fantastic feature of the VSCO Photo Editor, through which you can adjust and manipulate certain areas by controlling their exposure. This technique is widely used in mainstream photography and generates professional results by giving attention to details. It surely sounds amazing.
3. Skin Tone
Do you want to manage the skin tone of the characters present in your picture? Use the feature of skin tone provided by this tool to enhance, dim, and adjust the skin tone naturally with a single click. This feature is mostly applied in enhancing selfie portraits by adjusting the skin color accordingly. It deserves applause!
4. Borders
Borders on photos add a creative touch and set a new perception for the audience. After capturing the photo, you can apply various borders such as white or black borders and can give a new dimension to your image. A suitable border will effortlessly provide a professional touch instantly.
5. Highlight and Fade
Fading and highlighting the images are widely applied techniques to tell the genre of the captured image. For instance, you can fade the picture to give it a vintage look, and similarly, you can highlight certain parts of a photo to make it more vibrant and modern. Do you wish to use it?
 Video Converter Factory Pro
Part 2: 10 Helpful Tips to Use VSCO Photo Editor
In this section, we will enlist 10 helpful tips through which you can build amazing VSCO edits without wasting your time unnecessarily. Are you seeking a similar thing? Read the following tips carefully and get ready to share alluring images with the world:
 SwifDoo PDF Perpetual (2-PC) Free upgrade. No monthly fees ever.
1. Makes Adjustments
Before starting with editing your picture, the first rule is to crop the picture by making appropriate pictures. Make sure that the angle of your photo is correct and straight by removing the unwanted edges and objects from the frame. Your subject should be at the center so that it can instantly catch a viewer’s attention. You can do this entire process manually or automatically on the VSCO Photo Editor.
2. Control the Light Exposure
Light exposure is the other significant element of the picture as a perfect light exposure draws attention and seems pleasant to the eyes. Many times, individuals capture photos in daylight or in a room where the light exposure is minimum. If your subject is not illuminated perfectly, you can effectively control the light exposure through the VSCO Photo Editor.
3. Adjust the White Balance
White balancing is another technique through which you can enhance the colors present in your picture. VSCO Photo Editor has this advanced function through which you can increase the temperature of the image by highlighting the colors, or you can add a tint to make the colors softer.
4. Make Skin Tone Natural
Are you annoyed due to your unnatural skin color in the selfie? Try VSCO Photo Editor to adjust your skin tone with a single click. Your skin tone in the captured image depends on the light exposure. So, if you have captured your selfie in dim light, make your skin color natural and bright with the VSCO Photo Editor.
5. Add Grains for a Vintage Look
Vintage pictures have their own uniqueness and charm that attracts the viewer’s attention instantly. By adding grains from this editor, you can easily give the picture a vintage touch with a single click. For example, if you have captured a picture of a historic building, you can add grains to it to make it more captivating.

6. Split the Tone
Do you want to give your picture a vibrant look? Use the exclusive feature of “Split Tone” by VSCO Photo Editor to add two colors to the shadows and highlights of your picture. You can create a contemporary image with more vibrant shadows and highlights through this option.
7. Control the Saturation
Saturation in photography means controlling the sharpness and intensity of the colors. If you have captured a faded color photo, you increase its intensity by enhancing its saturation. As a result, the human eye will automatically give attention to the color details in your picture.

8. Adjust the Intensity of Filters
Filters are the best thing present in every photo editor. However, VSCO edits are different than any ordinary photo editor as it gives the option to control the intensity of your picture in each filter. Thus, you can add layers of filters to your image and adjust their intensity according to your will.
 OtsAV TV Webcaster
9. Sharpen the Edges
Another tip to make the features, props, or background look catchier is to sharpen them through this editor. By sharpening the image, you can illustrate the picture more clearly to the audience.
 The Tube Sites Submitter is a fast and efficient tool for anyone who needs to upload videos quickly, easily and automatically to hundreds of tube sites in mere minutes .
10. Add Text to Describe
Who does not like to add text to photos to post a story on social media accounts? Through VSCO, you can add text boxes to your images and add exciting phrases to post on social media platforms. You can select fonts and colors through this editor.
Conclusion
People rely on photo editors to generate captivating results and describe the emotion in an ordinary picture. For your ease, we have described the VSCO Photo Editor in length along with its distinct features. Are you satisfied? We recommend this particular editor due to its unique filters and professional editing tools. Get started with it, and wish for the best results!
- Title: A Complete Overview of VSCO Photo Editor
- Author: Mark
- Created at : 2024-07-26 20:47:20
- Updated at : 2024-07-27 20:47:20
- Link: https://extra-lessons.techidaily.com/a-complete-overview-of-vsco-photo-editor/
- License: This work is licensed under CC BY-NC-SA 4.0.