
"Animated Text Tips Free Inclusion Techniques"
Animated Text Tips: Free Inclusion Techniques
You may be interested in learning how to spice up your films using text animation makers online for free because that will increase viewer’s interest with your video marketing. You may think about using word animations in your films to enhance interest and draw the viewer in. These days, text is a part of almost every video and for that, people often refer to text animation online for free. Find out the easy ways to use free text animation using this guide.
Small company product videos, social media promos, webinars, infomercials, and other free title animation media are significantly enhanced by the use of text animations. You can create spectacular and distinctive animations to every piece of text with the free text animation program. You’ve come to the right place if you’re seeking for an easy method to add animated text to a video. In this text animation maker online free guide, we’ll show you how to add moving text to your movies to further enhance their impact.
Part 1. How to Add Free Animation to Video Online
With the help of the text animation tool Kapwing , users may include moving text in their films or photographs. The fact that you can upload any text or an existing one to the app and then add your own voice to make the text speak makes it simple to use. Kapwing provides some of the fundamental tools required to make a video with animated text. Your movie may have background music added, and you can choose how quickly you want the animated text to move.
How to Add Free Animation Using Kapwing
Kapwing is a straightforward yet effective program that enables users to animate their words in only three easy steps:
1. Upload Your Video to Kapwing
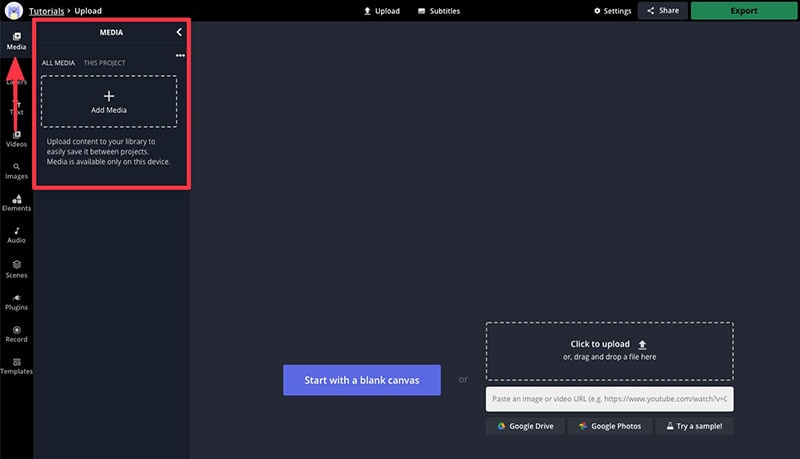
Create a new video project by signing into Kapwing first. To do both at once, click this link: begin right away. After that, you may either choose a template or start from scratch by making a new video. You’ll enter the Kapwing video editor after making your selection. Click “Select background” and then “Upload” after tapping the canvas. Choose the video you wish to include.
2. Add Texts to Your Video
Words. Aren’t they fantastic? There are practically millions of options available. With the Kapwing app, you may include as many as you like in your movie. Enter your message in the text field on the canvas by typing. Interested in adding extra text fields? If you want to add more, click the addition sign (+) next to the text area.
3. Animate and personalize your video text
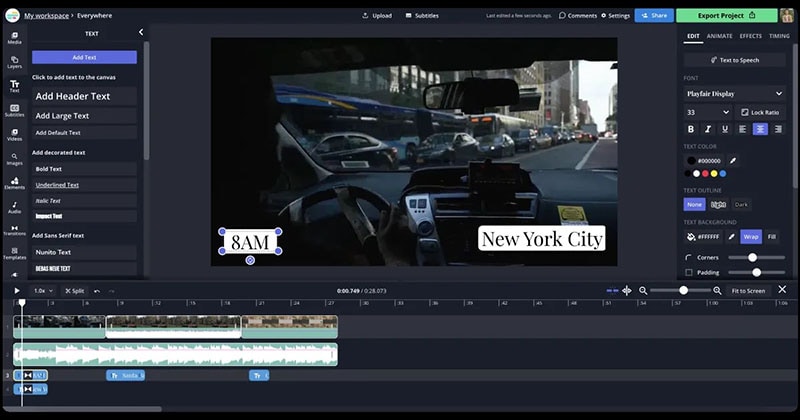
The fun part is about to begin. You may drag your text to any location by clicking on it. By modifying the color, size, and alignment of your words, you may completely alter the appearance of your text. Well, almost anything can be customized.
Part 2. How to Add Free Animation to Video on PC
For PC users, Filmora is the top choice. It’s ideal for both novice and experienced users, and has many fantastic editing tools. You may alter music and video, change the way that material looks and feels, and decide on branching situations simply and effectively using the software’s full-featured editor. With Shotcut, creating high-quality content is really simple since you have access to all the knowledge, resources, and tools you need. It contains multi-format timelines and allows native editing of media files.
Free Download For Win 7 or later(64-bit)
Free Download For macOS 10.14 or later
Step1 Add media to Software
Right after installing the program, you need to launch the Video editor and the first step is to import your content into “Project Media,” which is on the left side of the screen. Once imported, drag the material into the blank canvas.


Step2 Add Texts to Videos
To give your film the ideal appearance, you may choose from a wide variety of styles, themes, and fonts. The menu on the left side of the screen should say Annotations tab, so choose that. The default text may be changed by double-clicking it and typing in your own. Depending on your tastes and how well they complement the movie, you may adjust the color and opacity by choosing the attributes option on the right side.

Step3 Make Your Animated Text
To fit the longest name or title that will be entered on the same toolbar as the Annotations tab, adjust your text’s length in the bottom third. This enables you to keep a steady text size and length for the whole of your video. You may adjust the layers you’ve created to your tastes and the optimum flow for your video.
 Jet Profiler for MySQL, Enterprise Version: Jet Profiler for MySQL is real-time query performance and diagnostics tool for the MySQL database server. Its detailed query information, graphical interface and ease of use makes this a great tool for finding performance bottlenecks in your MySQL databases.
Step4 Add Keyframing
To add life and movement to your videos, use animation effects and keyframing. It streamlines animation and makes it possible to quickly apply modifications like expanding, rotating, and narrowing. Filmora will automatically add all the intermediate frames while maintaining coherence if you just choose the starting and finishing keyframes. The location, transparency, size, and other characteristics of keyframes may all be changed.
Step5 Export the Animated Content
Simply click the Export button in the top-right corner of the screen, as shown below, to export the text animations as a GIF whenever you’re done using them in your projects. In addition to using the desired format option in the export box, you may now select to share your work directly from your official YouTube account with just one click.

Part 3. How to Add Free Animation to Video on Mac
Filmora is more than simply a tool for video editing; it also enables users to animate words with a variety of effects, including reflection, shadow, transparency, and more. However, you may use Apple Inc.’s iMovie program to get started with a built-in toolbox. In this way, video editing may be started on a mobile device and finished on a Mac computer. Users of the program may rotate the letters by modifying their angle, size, and location so that it perfectly complements their backdrop video or picture.
Step1 Start iMovie
On your Mac, iMovie should already be installed; if not, go to the app store and free download it.
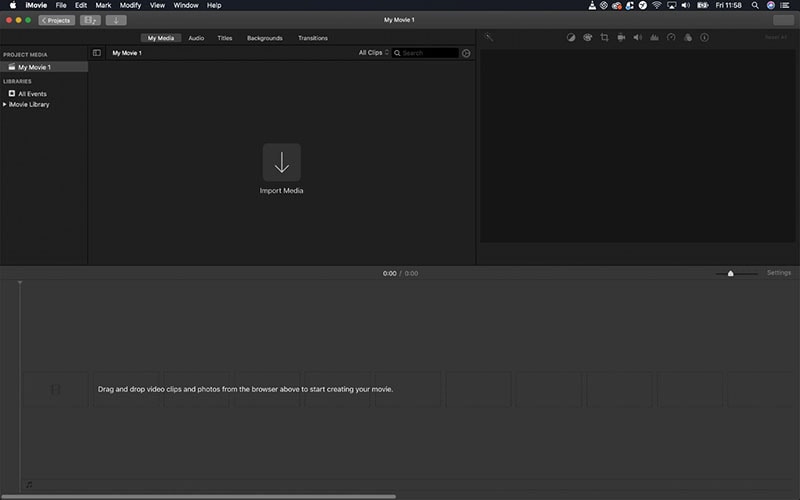
Step2 Import Videos
The next step is to import your video, Download the picture, open it in any photo editor, remove the black borders around it, and then add whatever text you choose. To choose a clip instead, pick the import footage option.
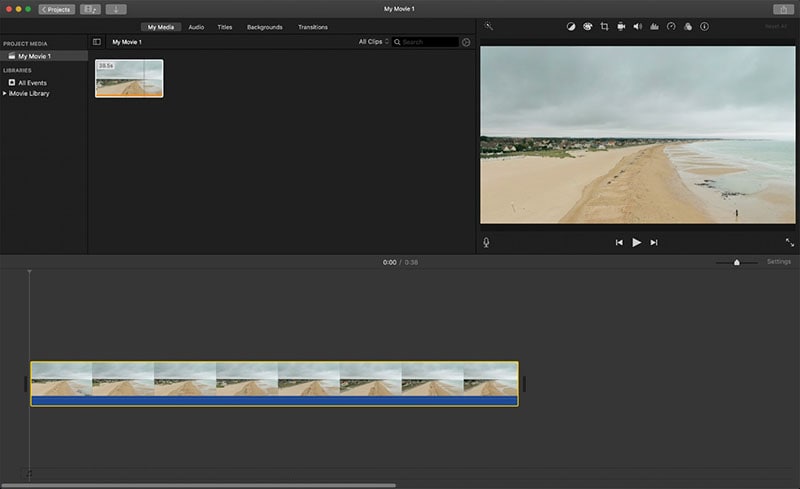
Step3 Add and Edit Text
The title in the preview may be clicked to alter the text. Additionally, you may alter the font, color, and orientation. Although you can’t change the animation, some of the pre-made transitions are pretty good. The duration may also be changed by dragging the text’s boundary on your timeline.
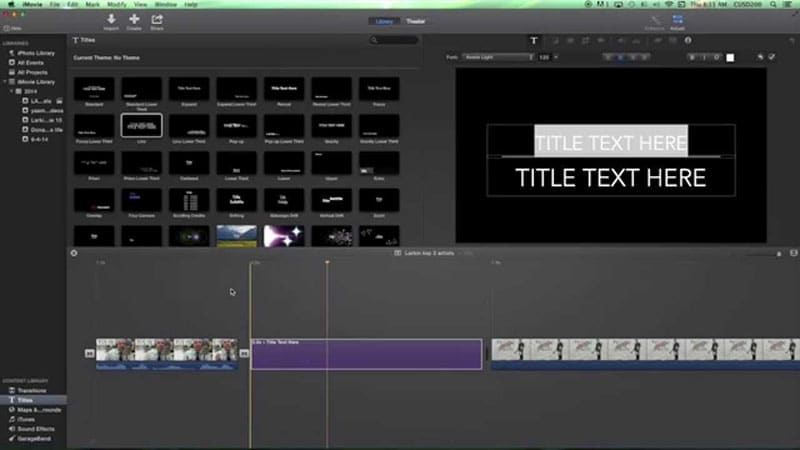
Step4 Include Animations to Texts
Now choose the appropriate title under the Titles menu. You may get a brief live preview of the titles by moving your cursor over them. Drag the one you prefer into your timeline after you’ve discovered it. Type whatever text you like in the text box by selecting the Text icon at the top of the interface, and then choose the Animate button to give it an animated effect.

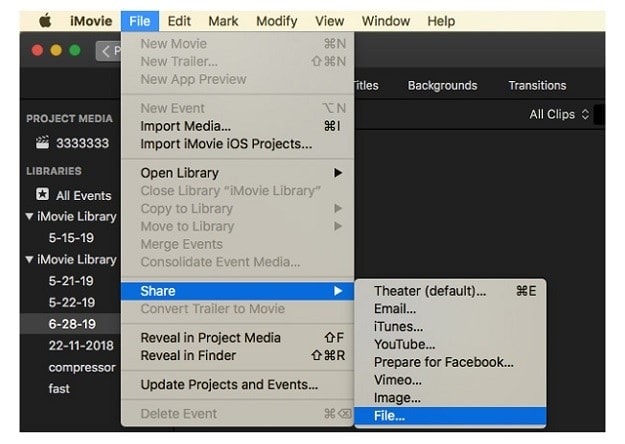
Step5 Export the Project
After finishing your Keynote text animation, export it sing Share > File and then select the format. To obtain the best results, be sure to export in high resolution for a better experience.
Part 4. How to Add Free Animation to Video on Mobile
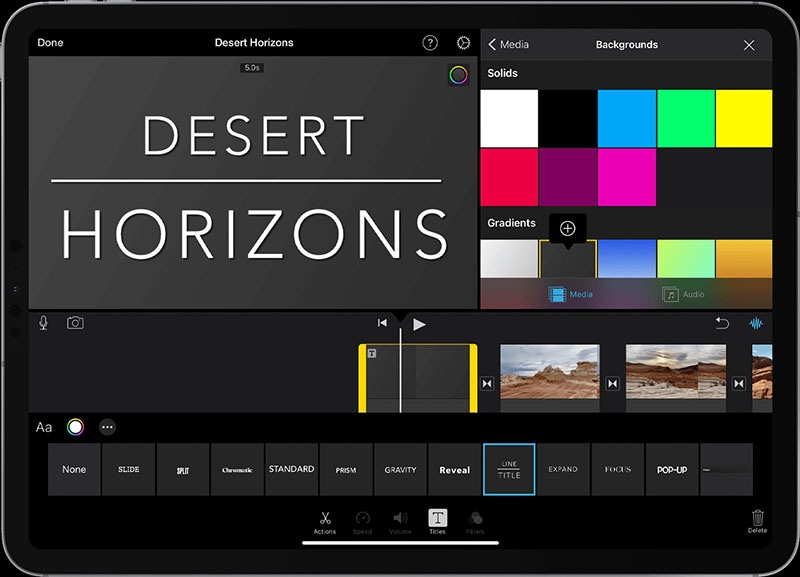
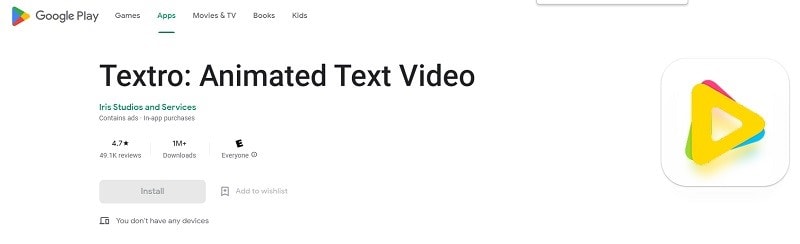
Making films with animated text is a breeze with Textro, a video editing program that enables you to add text and add animated text effects like shadow, light, reflection, etc. to your texts. Your videos will appear polished in no time! You may make a fantastic film with mixed media material by using the program, which also permits adding photographs, videos, and other images to your video.
Utilizing Textro is quite easy. All you have to do is choose the items you want to include in your movie in the correct sequence, then add a title to the finished product. You share the trend of editors using increasingly inventive methods to add motion text to their work, whether it be on YouTube channels or in Hollywood films. Following that, you may choose a broad topic for your video, which will also contain an introduction. Whatever the case, you may, of course, edit your material more thoroughly if you so want.
Step1 Download the App
To get started, just download the app. It will ask you to add text when you first run the software.
 Power Tools add-on for Google Sheets, 12-month subscription
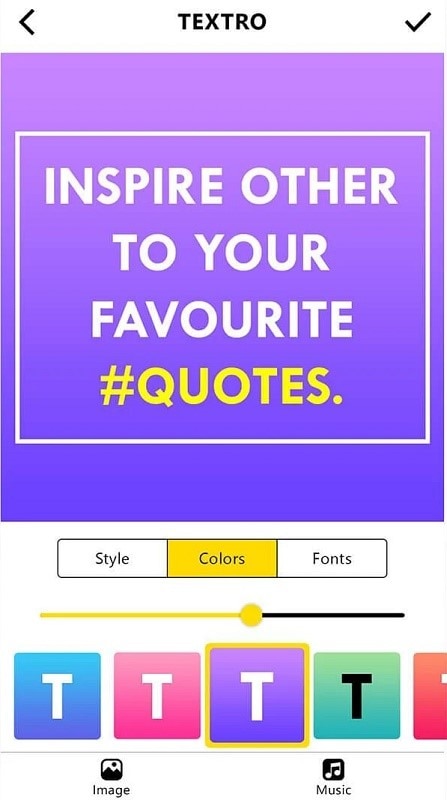
Step2 Add Text and Customize
By clicking the random button, you may create an entirely new color combination or change the color scheme of the post using the options that are currently available.
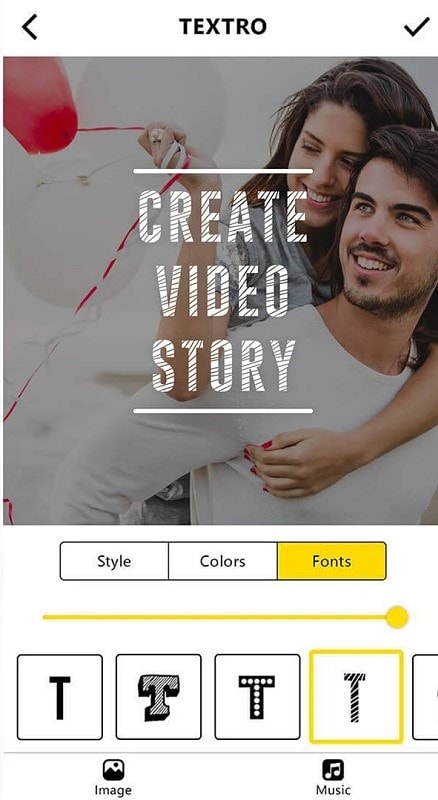
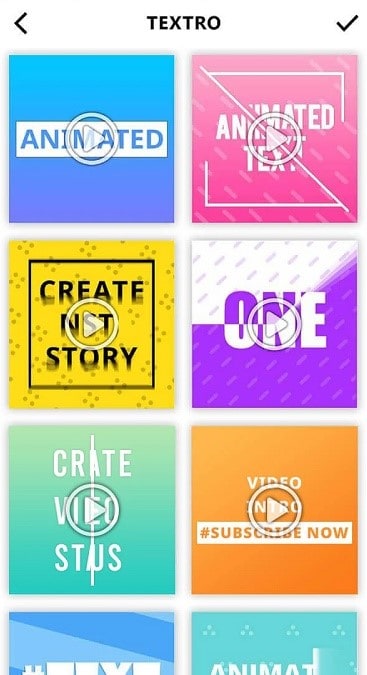
Step3 Add Animated Template and Customize
From the list of templates in both Fonts and Colors tab, select the best suited one and add it to the text. In this way, you can add text adjustments while customizations hand in hand.
Step4 Save the Project
Finally, after the necessary customizations, may be saved to your phone or immediately shared on Instagram. The project may also be downloaded on your phone or immediately shared on other social media sites.
Conclusion
After all, during the last several years, videos have been one of the most popular forms of content marketing. Even while creating videos might be labor-intensive since you must first determine your target audience and tailor your narrative to suit them, editing films is undoubtedly one of the most demanding tasks in this respect. Knowing which text animation programs work best for your marketing videos is thus made easy with this guide.
Free Download For macOS 10.14 or later
Step1 Add media to Software
Right after installing the program, you need to launch the Video editor and the first step is to import your content into “Project Media,” which is on the left side of the screen. Once imported, drag the material into the blank canvas.

Step2 Add Texts to Videos
To give your film the ideal appearance, you may choose from a wide variety of styles, themes, and fonts. The menu on the left side of the screen should say Annotations tab, so choose that. The default text may be changed by double-clicking it and typing in your own. Depending on your tastes and how well they complement the movie, you may adjust the color and opacity by choosing the attributes option on the right side.
Step3 Make Your Animated Text
To fit the longest name or title that will be entered on the same toolbar as the Annotations tab, adjust your text’s length in the bottom third. This enables you to keep a steady text size and length for the whole of your video. You may adjust the layers you’ve created to your tastes and the optimum flow for your video.
Step4 Add Keyframing
To add life and movement to your videos, use animation effects and keyframing. It streamlines animation and makes it possible to quickly apply modifications like expanding, rotating, and narrowing. Filmora will automatically add all the intermediate frames while maintaining coherence if you just choose the starting and finishing keyframes. The location, transparency, size, and other characteristics of keyframes may all be changed.
Step5 Export the Animated Content
Simply click the Export button in the top-right corner of the screen, as shown below, to export the text animations as a GIF whenever you’re done using them in your projects. In addition to using the desired format option in the export box, you may now select to share your work directly from your official YouTube account with just one click.
Part 3. How to Add Free Animation to Video on Mac
Filmora is more than simply a tool for video editing; it also enables users to animate words with a variety of effects, including reflection, shadow, transparency, and more. However, you may use Apple Inc.’s iMovie program to get started with a built-in toolbox. In this way, video editing may be started on a mobile device and finished on a Mac computer. Users of the program may rotate the letters by modifying their angle, size, and location so that it perfectly complements their backdrop video or picture.
Step1 Start iMovie
On your Mac, iMovie should already be installed; if not, go to the app store and free download it.
Step2 Import Videos
The next step is to import your video, Download the picture, open it in any photo editor, remove the black borders around it, and then add whatever text you choose. To choose a clip instead, pick the import footage option.
Step3 Add and Edit Text
The title in the preview may be clicked to alter the text. Additionally, you may alter the font, color, and orientation. Although you can’t change the animation, some of the pre-made transitions are pretty good. The duration may also be changed by dragging the text’s boundary on your timeline.
 Power Tools add-on for Google Sheets, Lifetime subscription
Step4 Include Animations to Texts
Now choose the appropriate title under the Titles menu. You may get a brief live preview of the titles by moving your cursor over them. Drag the one you prefer into your timeline after you’ve discovered it. Type whatever text you like in the text box by selecting the Text icon at the top of the interface, and then choose the Animate button to give it an animated effect.
Step5 Export the Project
After finishing your Keynote text animation, export it sing Share > File and then select the format. To obtain the best results, be sure to export in high resolution for a better experience.

Part 4. How to Add Free Animation to Video on Mobile
Making films with animated text is a breeze with Textro, a video editing program that enables you to add text and add animated text effects like shadow, light, reflection, etc. to your texts. Your videos will appear polished in no time! You may make a fantastic film with mixed media material by using the program, which also permits adding photographs, videos, and other images to your video.
Utilizing Textro is quite easy. All you have to do is choose the items you want to include in your movie in the correct sequence, then add a title to the finished product. You share the trend of editors using increasingly inventive methods to add motion text to their work, whether it be on YouTube channels or in Hollywood films. Following that, you may choose a broad topic for your video, which will also contain an introduction. Whatever the case, you may, of course, edit your material more thoroughly if you so want.
Step1 Download the App
To get started, just download the app. It will ask you to add text when you first run the software.
Step2 Add Text and Customize
By clicking the random button, you may create an entirely new color combination or change the color scheme of the post using the options that are currently available.

WPS Office Premium ( File Recovery, Photo Scanning, Convert PDF)–Yearly
Step3 Add Animated Template and Customize
From the list of templates in both Fonts and Colors tab, select the best suited one and add it to the text. In this way, you can add text adjustments while customizations hand in hand.
 OtsAV Radio Webcaster
Step4 Save the Project
Finally, after the necessary customizations, may be saved to your phone or immediately shared on Instagram. The project may also be downloaded on your phone or immediately shared on other social media sites.
 PDF application, powered by AI-based OCR, for unified workflows with both digital and scanned documents.
 Conclusion
After all, during the last several years, videos have been one of the most popular forms of content marketing. Even while creating videos might be labor-intensive since you must first determine your target audience and tailor your narrative to suit them, editing films is undoubtedly one of the most demanding tasks in this respect. Knowing which text animation programs work best for your marketing videos is thus made easy with this guide.
- Title: Animated Text Tips Free Inclusion Techniques
- Author: Mark
- Created at : 2024-07-26 18:53:59
- Updated at : 2024-07-27 18:53:59
- Link: https://extra-lessons.techidaily.com/animated-text-tips-free-inclusion-techniques/
- License: This work is licensed under CC BY-NC-SA 4.0.