
"Crafting Wide-Angle Photos with a Fisheye Effect"
Crafting Wide-Angle Photos with a Fisheye Effect
How to Create 360 Degree Photos/Images with Fisheye Lens


Benjamin Arango
Mar 27, 2024• Proven solutions
Shooting 360 degrees panoramas with fisheye lens
The process of shooting panoramas with fisheye lenses involves a number of considerations and they are as follows-:

1. The equipment and setup
To shoot quality 360 degrees panoramas with fisheye, it is imperative to get the equipment as well as the set up right. Your equipment needs to be calibrated properly to make the stitching process nice and easy. To find the best setting for your equipment, the grid method is recommended on the panohead.
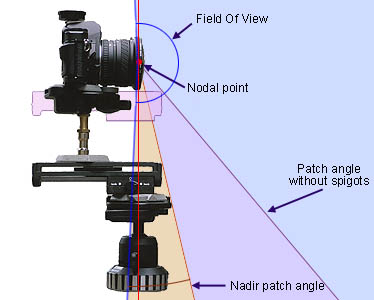

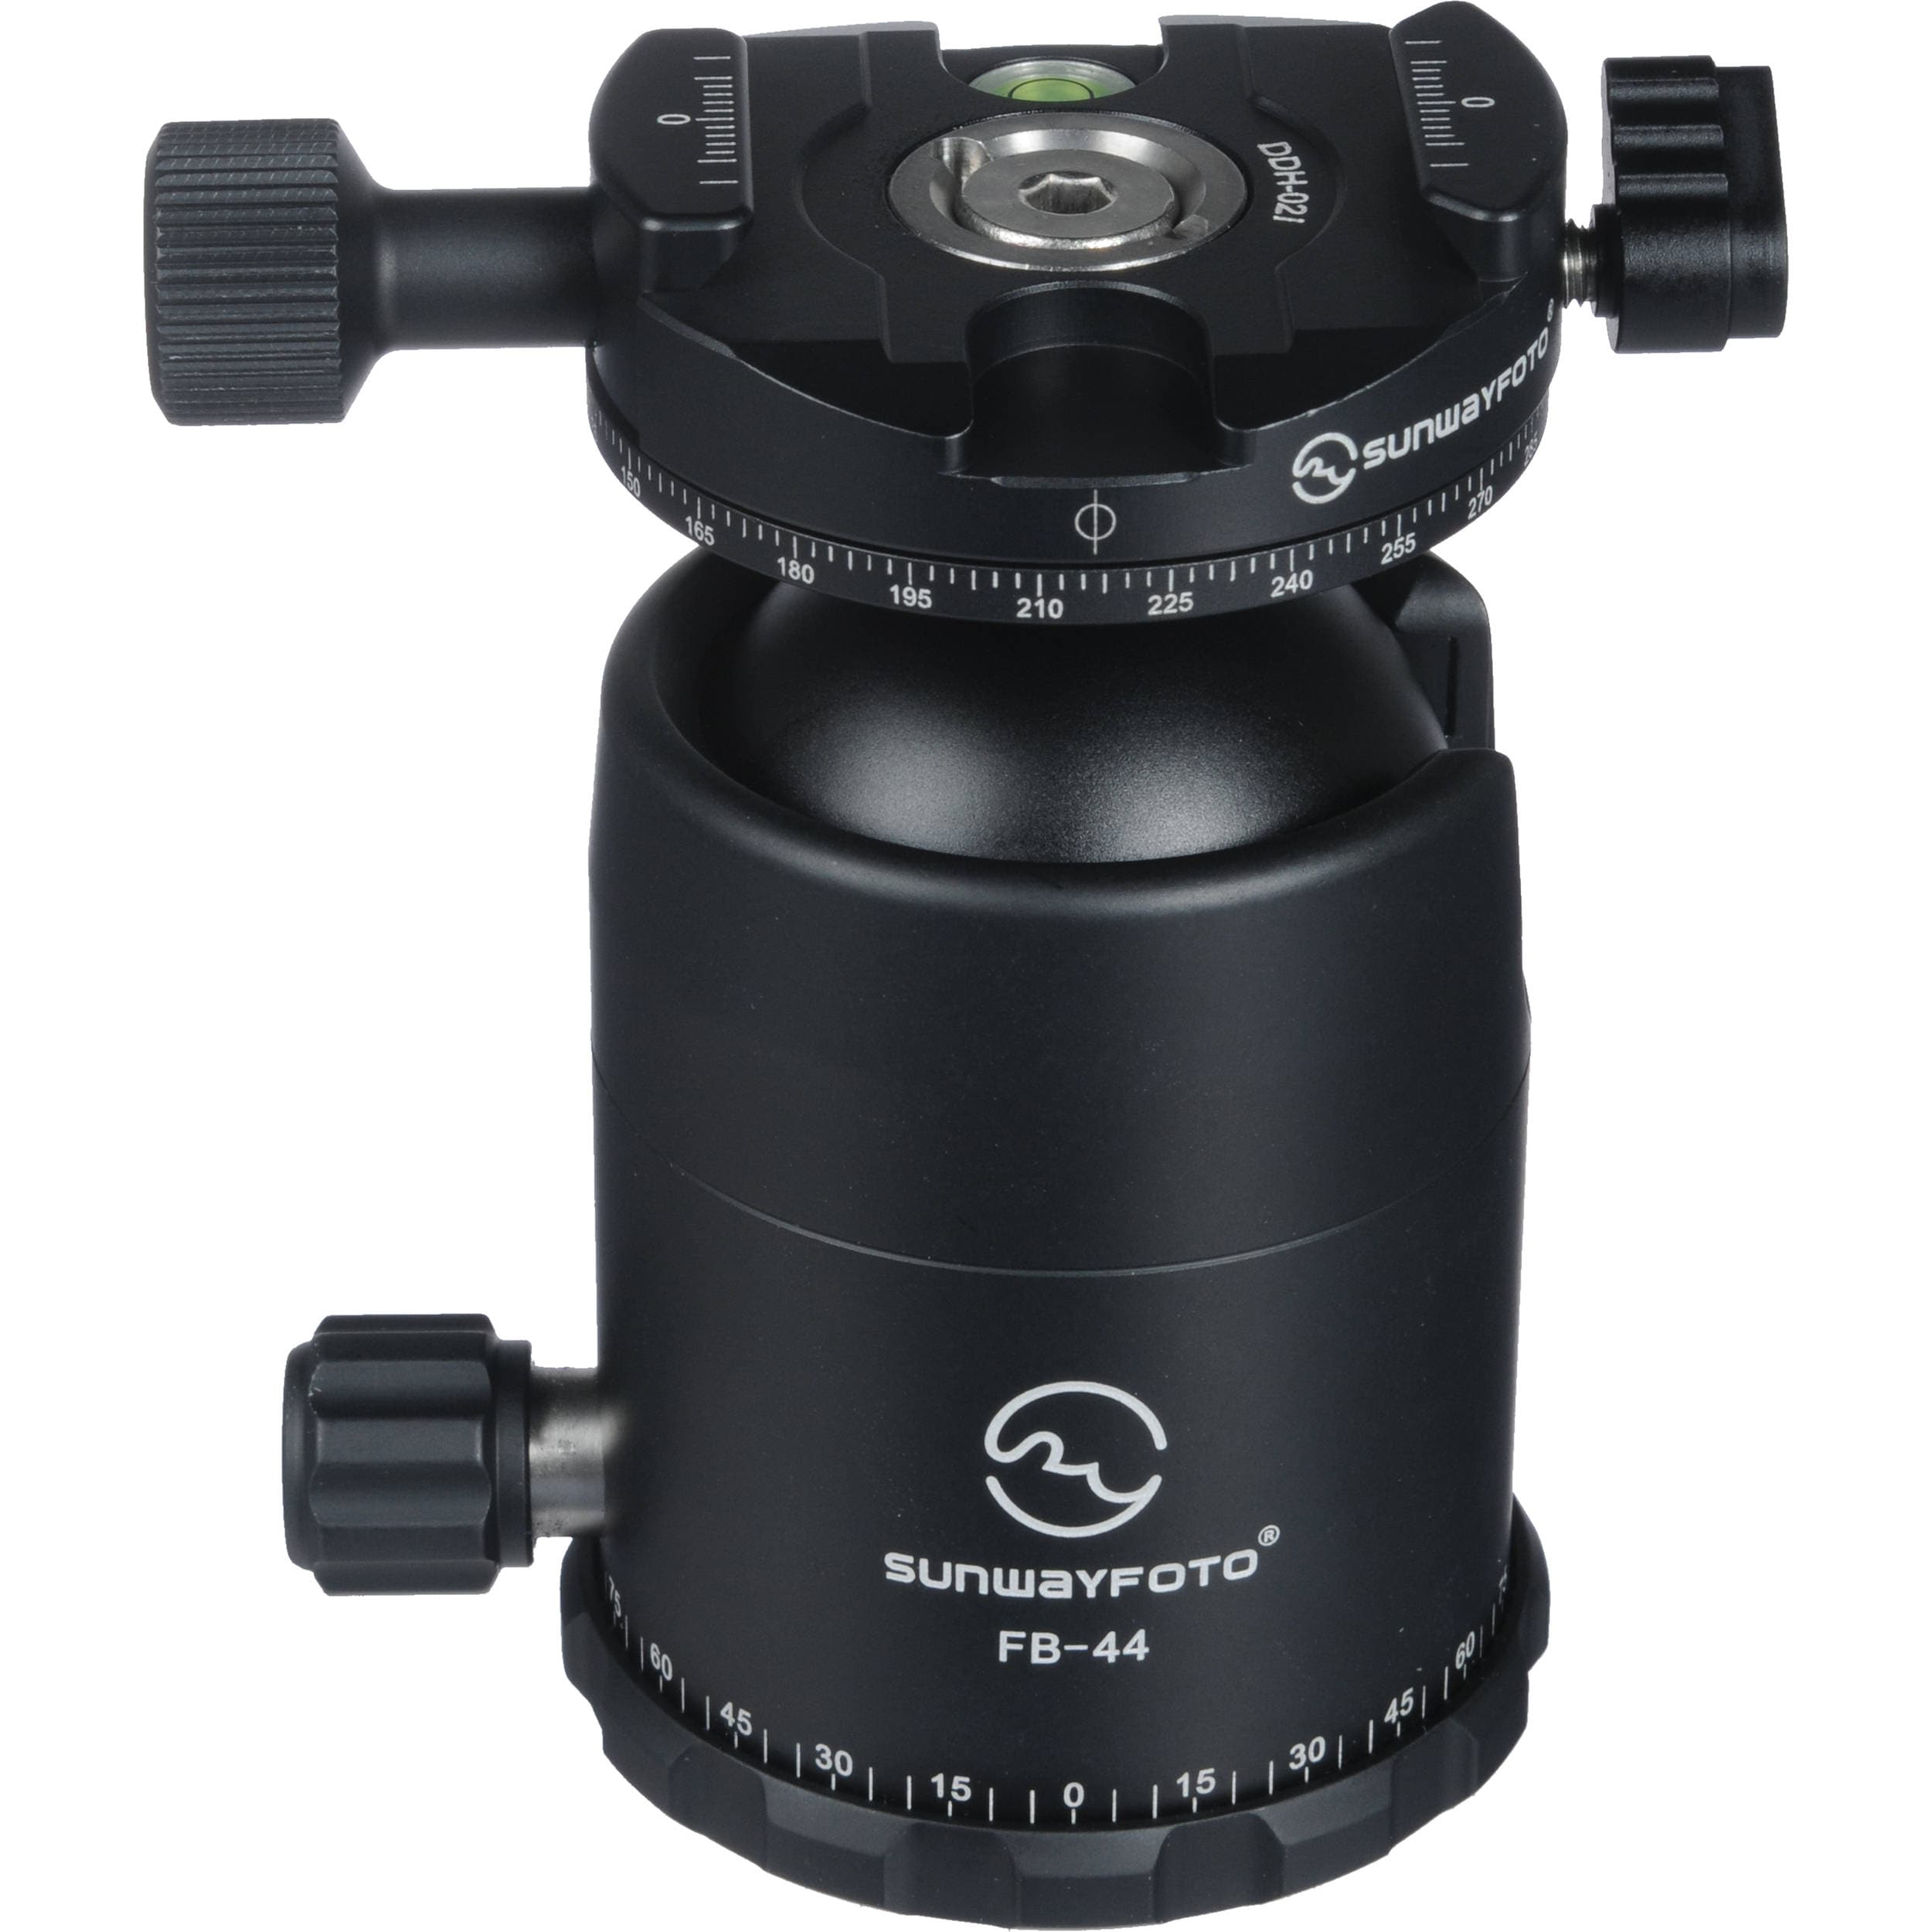
2. Leveling and rotating
Other than setting up and calibrating the equipment in the right manner, it is important to keep the camera steady and leveled as you make the rotations to take shots. For leveling, it is recommended to use an appropriate leveling base, while for rotation, using a panning clamp on top of the ballhead is highly recommended.

3. The actual shooting
For a full frame camera with 15mm fisheye lens in the portrait position, you will require a total of six shot rounds and 1 up to complete a full sphere. If you were using a crop-sensor camera, you will need to have a 10mm fisheye lens to achieve the same sequence.
But if you don’t mind the resolution, you are free to use 12mm fisheye on full frame or 8mm fisheye on a crop sensor for four shots round with the camera at five degrees up. With this method, there will be no need for a zenith shot and you can easily patch the tripod spot when editing in Photoshop.
This video will show you simple steps on shooting 360 degree images with fisheye lens
Keep this in mind when shooting 360 degree panoramas with fisheye
In normal photography, it always pays to remember what to include and what to exclude in your shots. When it comes to shooting 360s, it becomes more complicated since everything is included. For you to take successful 360s with fisheye therefore, you need to consider keenly where you stand. The fisheye lens will introduce a lot of space between you and the subject, hence you must consider how close or far away you are from the subject so that the pieces of the compositional puzzle will fall in place smoothly both in the horizontal and vertical planes.

Stitching 360 degrees panoramas after shooting
To stitch 360s taken by fisheye lenses after shooting, you will need panorama software like Autopano Pro or PTGui . For Autopano Pro, you begin by importing the images into the software and ensuring that the EXIF are displayed correctly on the program. With the right settings in place, the next step is to launch the direct stitching feature if you don’t want to go the manual way. Once the stitching is done, it will be important to present the output online. This can be done using Pano2VR or you could simply upload the finished panoramas to 360cities for online viewing.
You might be also interested in:
How to stitch GoPro clips into 360 videos >>
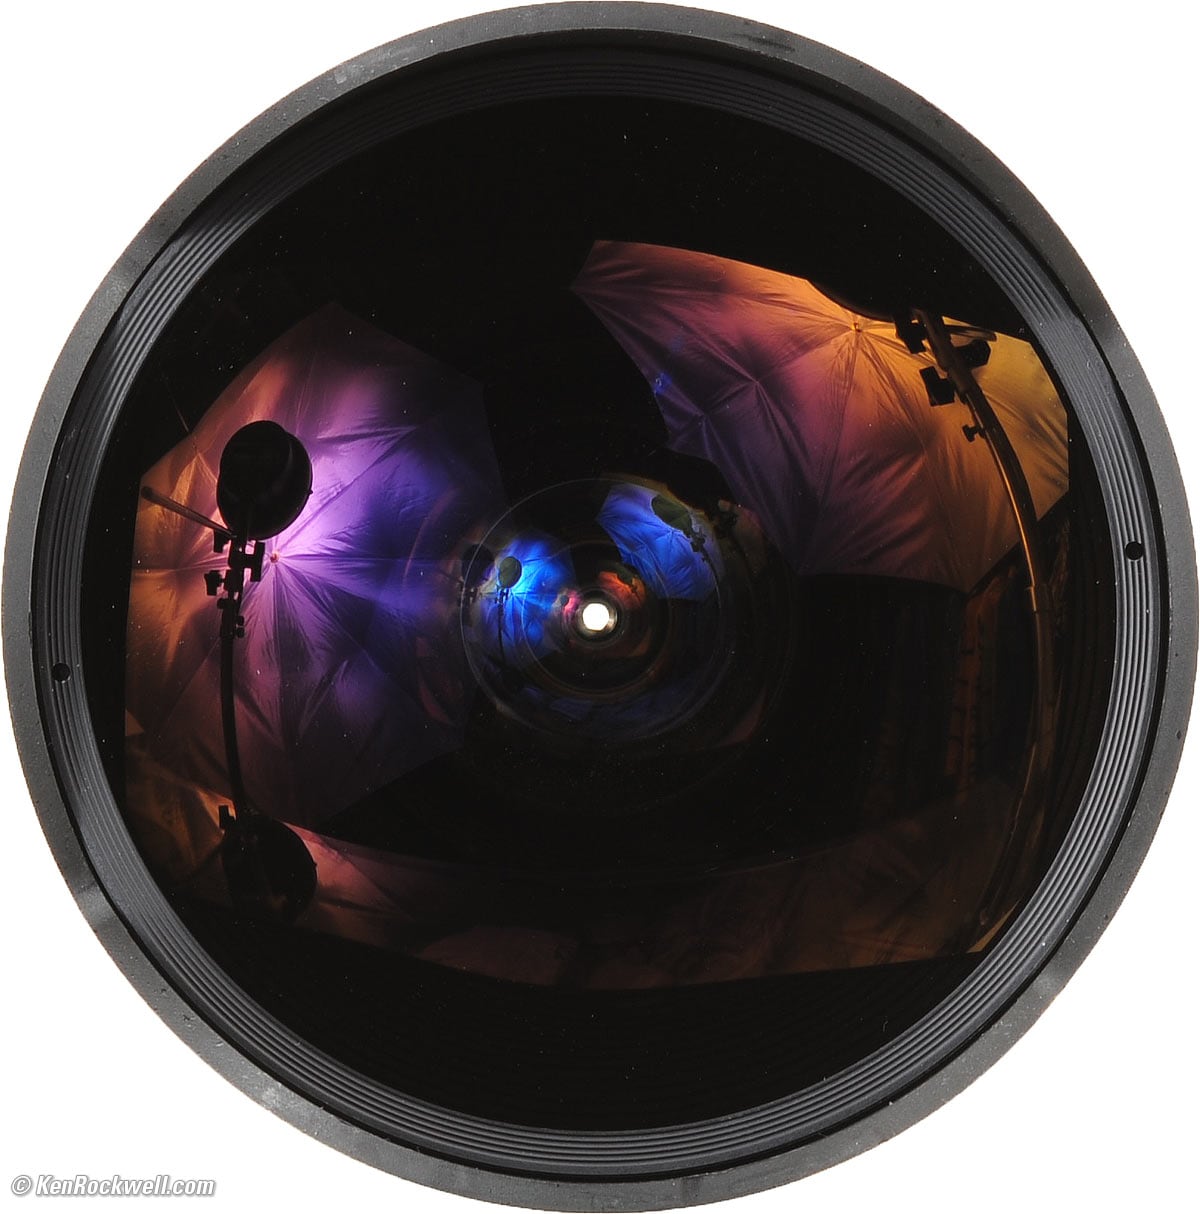
What’s fisheye lenses
Fisheye lens refers to an ultra wide angle lens used to produce strong visual distortions with the aim of creating a wide hemispherical or panoramic image. Fisheye lenses are able to achieve very wide angles of view not through the production of straight lines of perspectives, but through a special mapping which makes the resulting images have the characteristic convex non-rectilinear appearance.
The term fisheye was started by American Physicist and inventor Robert Wood in 1906 and it was in reference to how a fish would have an ultra wide hemispherical view while swimming deep in the waters. The first practical use of these kinds of lenses was in 1920s in meteorology when they were used to study the formation of clouds up in the sky. The angles for these lenses are always very wide and can range from anywhere between 1000 and 1800, while their focal lengths depend on the format of the film as well as the intended applications.
The fisheye lenses are used for a myriad of applications, especially in digital photography. They can also be used for re-projecting images captured by a fisheye lens or computer generated graphics onto hemispherical screens. Additionally, the lenses can be used in scientific photography such as studying canopy geometry, recording meteors and aurora, calculating near-ground solar radiation as well as in peepholes to offer a wide field of view to the users.
Conclusion
Fisheye lenses have been around for a while now and the process of creating 360 panoramas with them may not be very challenging, but great results are achieved through practice and proper stitching. Once the photos are taken, you can use premium panorama software like Autopano Pro or you can use free options like the Microsoft ICE or Hugin. Ones stitching are done, it is imperative to have the final works uploaded online for others to view.
Benjamin Arango
Benjamin Arango is a writer and a lover of all things video.
Follow @Benjamin Arango
Benjamin Arango
Mar 27, 2024• Proven solutions
Shooting 360 degrees panoramas with fisheye lens
The process of shooting panoramas with fisheye lenses involves a number of considerations and they are as follows-:
1. The equipment and setup
To shoot quality 360 degrees panoramas with fisheye, it is imperative to get the equipment as well as the set up right. Your equipment needs to be calibrated properly to make the stitching process nice and easy. To find the best setting for your equipment, the grid method is recommended on the panohead.
2. Leveling and rotating
Other than setting up and calibrating the equipment in the right manner, it is important to keep the camera steady and leveled as you make the rotations to take shots. For leveling, it is recommended to use an appropriate leveling base, while for rotation, using a panning clamp on top of the ballhead is highly recommended.

3. The actual shooting
For a full frame camera with 15mm fisheye lens in the portrait position, you will require a total of six shot rounds and 1 up to complete a full sphere. If you were using a crop-sensor camera, you will need to have a 10mm fisheye lens to achieve the same sequence.
But if you don’t mind the resolution, you are free to use 12mm fisheye on full frame or 8mm fisheye on a crop sensor for four shots round with the camera at five degrees up. With this method, there will be no need for a zenith shot and you can easily patch the tripod spot when editing in Photoshop.
This video will show you simple steps on shooting 360 degree images with fisheye lens
Keep this in mind when shooting 360 degree panoramas with fisheye
In normal photography, it always pays to remember what to include and what to exclude in your shots. When it comes to shooting 360s, it becomes more complicated since everything is included. For you to take successful 360s with fisheye therefore, you need to consider keenly where you stand. The fisheye lens will introduce a lot of space between you and the subject, hence you must consider how close or far away you are from the subject so that the pieces of the compositional puzzle will fall in place smoothly both in the horizontal and vertical planes.
Stitching 360 degrees panoramas after shooting
To stitch 360s taken by fisheye lenses after shooting, you will need panorama software like Autopano Pro or PTGui . For Autopano Pro, you begin by importing the images into the software and ensuring that the EXIF are displayed correctly on the program. With the right settings in place, the next step is to launch the direct stitching feature if you don’t want to go the manual way. Once the stitching is done, it will be important to present the output online. This can be done using Pano2VR or you could simply upload the finished panoramas to 360cities for online viewing.
You might be also interested in:
How to stitch GoPro clips into 360 videos >>
 PaperScan Professional: PaperScan Scanner Software is a powerful TWAIN & WIA scanning application centered on one idea: making document acquisition an unparalleled easy task for anyone.
What’s fisheye lenses
Fisheye lens refers to an ultra wide angle lens used to produce strong visual distortions with the aim of creating a wide hemispherical or panoramic image. Fisheye lenses are able to achieve very wide angles of view not through the production of straight lines of perspectives, but through a special mapping which makes the resulting images have the characteristic convex non-rectilinear appearance.
The term fisheye was started by American Physicist and inventor Robert Wood in 1906 and it was in reference to how a fish would have an ultra wide hemispherical view while swimming deep in the waters. The first practical use of these kinds of lenses was in 1920s in meteorology when they were used to study the formation of clouds up in the sky. The angles for these lenses are always very wide and can range from anywhere between 1000 and 1800, while their focal lengths depend on the format of the film as well as the intended applications.
The fisheye lenses are used for a myriad of applications, especially in digital photography. They can also be used for re-projecting images captured by a fisheye lens or computer generated graphics onto hemispherical screens. Additionally, the lenses can be used in scientific photography such as studying canopy geometry, recording meteors and aurora, calculating near-ground solar radiation as well as in peepholes to offer a wide field of view to the users.

Conclusion
Fisheye lenses have been around for a while now and the process of creating 360 panoramas with them may not be very challenging, but great results are achieved through practice and proper stitching. Once the photos are taken, you can use premium panorama software like Autopano Pro or you can use free options like the Microsoft ICE or Hugin. Ones stitching are done, it is imperative to have the final works uploaded online for others to view.
 HD Video Converter Factory Pro
Benjamin Arango
Benjamin Arango is a writer and a lover of all things video.
Follow @Benjamin Arango
Benjamin Arango
Mar 27, 2024• Proven solutions
 vMix 4K - Software based live production. vMix 4K includes everything in vMix HD plus 4K support, PTZ control, External/Fullscreen output, 4 Virtual Outputs, 1 Replay, 4 vMix Call, and 2 Recorders.
Shooting 360 degrees panoramas with fisheye lens
The process of shooting panoramas with fisheye lenses involves a number of considerations and they are as follows-:
1. The equipment and setup
To shoot quality 360 degrees panoramas with fisheye, it is imperative to get the equipment as well as the set up right. Your equipment needs to be calibrated properly to make the stitching process nice and easy. To find the best setting for your equipment, the grid method is recommended on the panohead.
 With Screensaver Wonder you can easily make a screensaver from your own pictures and video files. Create screensavers for your own computer or create standalone, self-installing screensavers for easy sharing with your friends. Together with its sister product Screensaver Factory, Screensaver Wonder is one of the most popular screensaver software products in the world, helping thousands of users decorate their computer screens quickly and easily.

2. Leveling and rotating
Other than setting up and calibrating the equipment in the right manner, it is important to keep the camera steady and leveled as you make the rotations to take shots. For leveling, it is recommended to use an appropriate leveling base, while for rotation, using a panning clamp on top of the ballhead is highly recommended.
3. The actual shooting
For a full frame camera with 15mm fisheye lens in the portrait position, you will require a total of six shot rounds and 1 up to complete a full sphere. If you were using a crop-sensor camera, you will need to have a 10mm fisheye lens to achieve the same sequence.
But if you don’t mind the resolution, you are free to use 12mm fisheye on full frame or 8mm fisheye on a crop sensor for four shots round with the camera at five degrees up. With this method, there will be no need for a zenith shot and you can easily patch the tripod spot when editing in Photoshop.
This video will show you simple steps on shooting 360 degree images with fisheye lens
Keep this in mind when shooting 360 degree panoramas with fisheye
In normal photography, it always pays to remember what to include and what to exclude in your shots. When it comes to shooting 360s, it becomes more complicated since everything is included. For you to take successful 360s with fisheye therefore, you need to consider keenly where you stand. The fisheye lens will introduce a lot of space between you and the subject, hence you must consider how close or far away you are from the subject so that the pieces of the compositional puzzle will fall in place smoothly both in the horizontal and vertical planes.
Stitching 360 degrees panoramas after shooting
To stitch 360s taken by fisheye lenses after shooting, you will need panorama software like Autopano Pro or PTGui . For Autopano Pro, you begin by importing the images into the software and ensuring that the EXIF are displayed correctly on the program. With the right settings in place, the next step is to launch the direct stitching feature if you don’t want to go the manual way. Once the stitching is done, it will be important to present the output online. This can be done using Pano2VR or you could simply upload the finished panoramas to 360cities for online viewing.
You might be also interested in:
How to stitch GoPro clips into 360 videos >>
What’s fisheye lenses
Fisheye lens refers to an ultra wide angle lens used to produce strong visual distortions with the aim of creating a wide hemispherical or panoramic image. Fisheye lenses are able to achieve very wide angles of view not through the production of straight lines of perspectives, but through a special mapping which makes the resulting images have the characteristic convex non-rectilinear appearance.
The term fisheye was started by American Physicist and inventor Robert Wood in 1906 and it was in reference to how a fish would have an ultra wide hemispherical view while swimming deep in the waters. The first practical use of these kinds of lenses was in 1920s in meteorology when they were used to study the formation of clouds up in the sky. The angles for these lenses are always very wide and can range from anywhere between 1000 and 1800, while their focal lengths depend on the format of the film as well as the intended applications.
The fisheye lenses are used for a myriad of applications, especially in digital photography. They can also be used for re-projecting images captured by a fisheye lens or computer generated graphics onto hemispherical screens. Additionally, the lenses can be used in scientific photography such as studying canopy geometry, recording meteors and aurora, calculating near-ground solar radiation as well as in peepholes to offer a wide field of view to the users.
Conclusion
Fisheye lenses have been around for a while now and the process of creating 360 panoramas with them may not be very challenging, but great results are achieved through practice and proper stitching. Once the photos are taken, you can use premium panorama software like Autopano Pro or you can use free options like the Microsoft ICE or Hugin. Ones stitching are done, it is imperative to have the final works uploaded online for others to view.
Benjamin Arango
Benjamin Arango is a writer and a lover of all things video.
Follow @Benjamin Arango
Benjamin Arango
Mar 27, 2024• Proven solutions
Shooting 360 degrees panoramas with fisheye lens
The process of shooting panoramas with fisheye lenses involves a number of considerations and they are as follows-:
1. The equipment and setup
To shoot quality 360 degrees panoramas with fisheye, it is imperative to get the equipment as well as the set up right. Your equipment needs to be calibrated properly to make the stitching process nice and easy. To find the best setting for your equipment, the grid method is recommended on the panohead.
2. Leveling and rotating
Other than setting up and calibrating the equipment in the right manner, it is important to keep the camera steady and leveled as you make the rotations to take shots. For leveling, it is recommended to use an appropriate leveling base, while for rotation, using a panning clamp on top of the ballhead is highly recommended.
 The Tube Sites Submitter is a fast and efficient tool for anyone who needs to upload videos quickly, easily and automatically to hundreds of tube sites in mere minutes .
3. The actual shooting
For a full frame camera with 15mm fisheye lens in the portrait position, you will require a total of six shot rounds and 1 up to complete a full sphere. If you were using a crop-sensor camera, you will need to have a 10mm fisheye lens to achieve the same sequence.
But if you don’t mind the resolution, you are free to use 12mm fisheye on full frame or 8mm fisheye on a crop sensor for four shots round with the camera at five degrees up. With this method, there will be no need for a zenith shot and you can easily patch the tripod spot when editing in Photoshop.
This video will show you simple steps on shooting 360 degree images with fisheye lens
Keep this in mind when shooting 360 degree panoramas with fisheye
In normal photography, it always pays to remember what to include and what to exclude in your shots. When it comes to shooting 360s, it becomes more complicated since everything is included. For you to take successful 360s with fisheye therefore, you need to consider keenly where you stand. The fisheye lens will introduce a lot of space between you and the subject, hence you must consider how close or far away you are from the subject so that the pieces of the compositional puzzle will fall in place smoothly both in the horizontal and vertical planes.
 Easy and Safe Partition Software & Hard Disk Manager
Stitching 360 degrees panoramas after shooting
To stitch 360s taken by fisheye lenses after shooting, you will need panorama software like Autopano Pro or PTGui . For Autopano Pro, you begin by importing the images into the software and ensuring that the EXIF are displayed correctly on the program. With the right settings in place, the next step is to launch the direct stitching feature if you don’t want to go the manual way. Once the stitching is done, it will be important to present the output online. This can be done using Pano2VR or you could simply upload the finished panoramas to 360cities for online viewing.
You might be also interested in:
How to stitch GoPro clips into 360 videos >>
What’s fisheye lenses
Fisheye lens refers to an ultra wide angle lens used to produce strong visual distortions with the aim of creating a wide hemispherical or panoramic image. Fisheye lenses are able to achieve very wide angles of view not through the production of straight lines of perspectives, but through a special mapping which makes the resulting images have the characteristic convex non-rectilinear appearance.
The term fisheye was started by American Physicist and inventor Robert Wood in 1906 and it was in reference to how a fish would have an ultra wide hemispherical view while swimming deep in the waters. The first practical use of these kinds of lenses was in 1920s in meteorology when they were used to study the formation of clouds up in the sky. The angles for these lenses are always very wide and can range from anywhere between 1000 and 1800, while their focal lengths depend on the format of the film as well as the intended applications.
The fisheye lenses are used for a myriad of applications, especially in digital photography. They can also be used for re-projecting images captured by a fisheye lens or computer generated graphics onto hemispherical screens. Additionally, the lenses can be used in scientific photography such as studying canopy geometry, recording meteors and aurora, calculating near-ground solar radiation as well as in peepholes to offer a wide field of view to the users.
Conclusion
Fisheye lenses have been around for a while now and the process of creating 360 panoramas with them may not be very challenging, but great results are achieved through practice and proper stitching. Once the photos are taken, you can use premium panorama software like Autopano Pro or you can use free options like the Microsoft ICE or Hugin. Ones stitching are done, it is imperative to have the final works uploaded online for others to view.
 Forex Robotron Basic Package
Benjamin Arango
Benjamin Arango is a writer and a lover of all things video.
Follow @Benjamin Arango
- Title: Crafting Wide-Angle Photos with a Fisheye Effect
- Author: Mark
- Created at : 2024-07-26 19:28:52
- Updated at : 2024-07-27 19:28:52
- Link: https://extra-lessons.techidaily.com/crafting-wide-angle-photos-with-a-fisheye-effect/
- License: This work is licensed under CC BY-NC-SA 4.0.