
"Mastering Canva 10 Best Practices Unveiled"
Mastering Canva: 10 Best Practices Unveiled
Everyone likes to do photography either for commercial purposes or for personal use. Moreover, you can opt for photography as a profession and earn unlimited monetary benefits. However, photography is not limited to capturing pictures as it only includes the editing phase. There are numerous photo editors in the market to conduct photo editing, but non-professionals are not aware enough to use such tools.
This article will include some valuable tips that you can apply through a professional editor: Canvaphotoeditor online . Let’s dig into details to know more about photo editing.
Part 1: 10 Helpful Tips for Using Canva Photo Editor
If you have clicked a photo that does not look artistic, creative, or flawless, you can still improve the quality of your photo through exceptional photo editing. Through the peculiar features and tools of the Canva image editor, implement the following tips to enhance your images effortlessly. You should look into these!
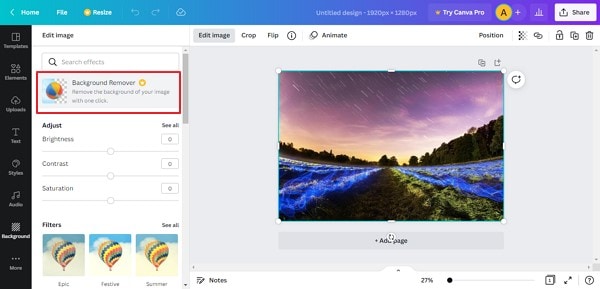
1. Remove Background
The background of your image is an integral part of the portrait as it facilitates grabbing the viewer’s attention. While capturing a picture, it is possible that there are some unnecessary objects or people in the frame. Or, in some cases, the background looks dull and ruins the whole image. Canva has introduced its background remover, through which you can quickly erase the background of your picture.
Moreover, you can design or choose pre-made background templates on this tool to add a vibrant and creative background. Thus, an eye-catchy background on your pictures can make a good impression of yours. Isn’t it great?

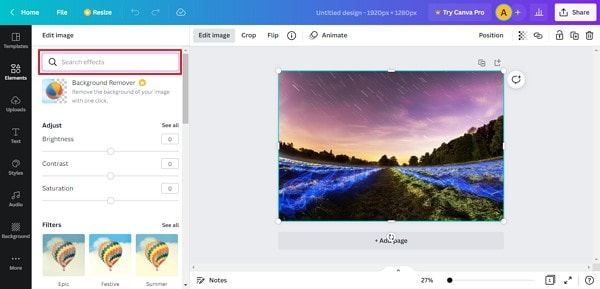
2. Apply Filters by Quick Search
Every photo editor consists of filters and effects to make ordinary photos look attractive. Just like other photo editors, Canva photo editor also has its exclusive filters that range in various options such as summer glow, natural tint, and many more. You can adjust the intensity of filters with your fingers and can manage their brightness, saturation, contrast, and tint effects.
Other interesting effects include BadTV, through which you can add cinematic and vintage effects to your photos by exploring different options. Thus, enhance and beautify your photos with a few swipes, and you can confidently post them across social media platforms. You should try it!

3. Add Text to Images
Do you like to post Instagram or Facebook stories with catchy captions embedded in them? Canva photo editor online gives you huge and diverse options to add text on the images with fancy styles and colors. You can add an aligned text by adjusting it to various angles such as right, left, or center. Afterward, you can select the font, color, and style of your added text through finger swipes.
You can also manage the size of your text to make it look appropriate and suitable for your image. Hence, you can use the text images to post them as stories on social media accounts or use them for commercial purposes. This is surely good!


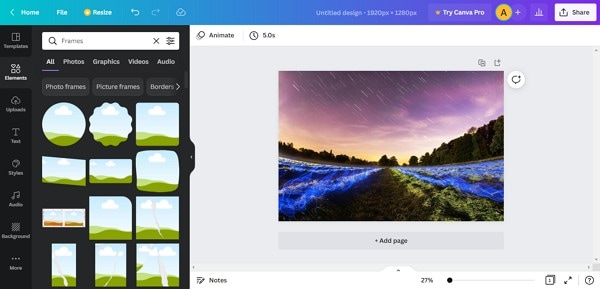
4. Add Frames to the Image
Do you know that adding a single frame to your photo can change the whole dynamic? Canva photo editor has an immense range of frames like polaroid black, polaroid white, film 1, film 2, and many more. You can add an artistic touch to your photos through polaroid frames without capturing them on polaroid cameras.
On the other hand, frames like film 1 and film 2 are extremely trendy, and many social media influencers apply them to their photos. You can also utilize other classic frames according to your choice to give a new look to your favorite photos. Isn’t this good?
 The BootIt Collection covers multi-booting, partitioning, and disk imaging on traditional PC’s using the standard BIOS and newer PC’s using UEFI. The collection includes BootIt Bare Metal (BIBM) for standard BIOS systems and BootIt UEFI (BIU) for UEFI system.
5. Create YouTube Thumbnails
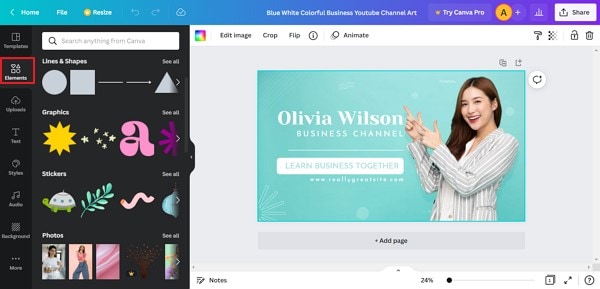
Canva photo editor is not only restricted for personal use as many users of YouTube also take benefits from this platform. YouTube thumbnails instantly grab the attention of the audience and help in click baits. You can use this platform to create trendy and appealing YouTube thumbnails to gain more views on the videos.
To create an eye-catchy YouTube thumbnail, use the “Highlight Effect” from this tool. For this, remove the existing background from your picture and apply the duotone image effect to the picture. Then adjust the highlights and shadows and select any color for the background. Thus, you can easily create a creative YouTube thumbnail from this editor.
.png) Kanto Player Professional
Kanto Player Professional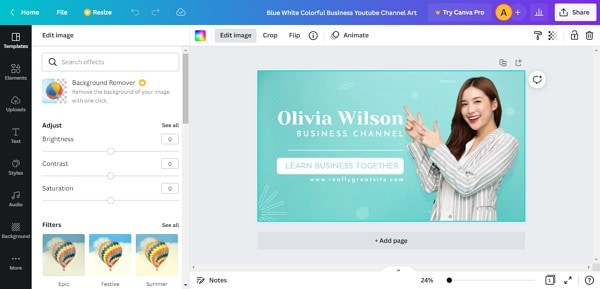
6. Add Different Elements
Another amazing feature of the Canva image editor is to add numerous elements to the photos effortlessly. You can add stickers, GIFs, and graphics to make an impactful photo. This tool stands out in adding elements to the images as it consists of more than 90 million graphics and stickers. Through their pre-made templates and in-built library, you can get creative ideas to design your image.
Hence, explore various stickers and graphics from this platform and instantly apply them to your photos for a funky and vibrant look. Look into this!
 ZoneAlarm Pro Antivirus + Firewall NextGen
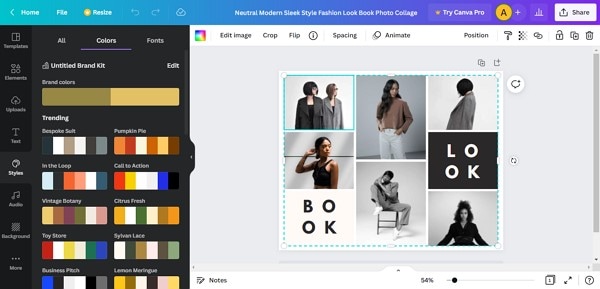
7. Make Photo Collage
Photo collage combines all of our favorite and preferred photos in a single frame, and viewers can see all the combined photos in a single place. Canva photo editor online allows the users to make photo collages by merging their photos with a single click. You can add different frames to the images and can apply filters, effects, stickers, and typography. So, combine all of your cherishing memories in a single frame and share it with your friends and family members.
 TubeDigger - online video downloader from mostly any site

 Nero Burning ROM:
The ultimate burning program for all your needs!
8. Design Mockups
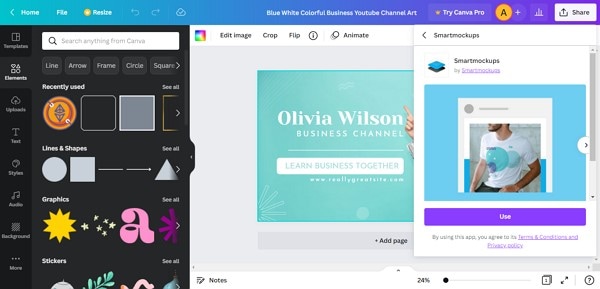
If you are editing images for a product shoot, clothing brand, or any other project, you can design a mockup for your brand with Canva photo editor. The feature is known as “Smartmockups,” through which you can print your brand logo, product name, or any other thing on a real-life object. It’s an exception feature to creatively print your images on real-like things instantly. Thus, you can give life to your product or brand logo by using this fantastic photo editor.
9. Use Auto Focus and Blur
Professional photographers use the features like auto-focus and blur to give depth or shallow of the field to the images. Canva photo editor has an option of “Auto Focus” to automatically adjust the focus of your photo to make it look sharp in high quality. On the other hand, using the option of “Blur” on this editor, you can blur certain parts of the image, such as the background or subjects of the picture.
By combining both of these features, you can easily craft a professional illustration through your images with a few retouches. This is great!

10. Mix the Colors
What makes the photos look more captivating? It’s a simple rule to play with colors present in the graphics and stickers that you want to apply to the images. Canva photo editor gives a free hand to the users to be more creative and original while editing their photos. For instance, you can design a theme for your image by adding graphics and stickers of the same color.
Moreover, you can use filters and color palettes that match well with your theme. Moreover, you can stylize the image for a magazine cover by mixing color ranges and layers through this exceptional tool. It sounds perfect!
Conclusion
Anyone can learn photo editing skills if they are provided with accurate guidelines. Learn about helpful tips to edit photos like a professional on Canva photo editor online through this well-written article. With a few clicks, you can easily take a dull photo that is appealing and fancy. Make sure to try this!
- Title: Mastering Canva 10 Best Practices Unveiled
- Author: Mark
- Created at : 2024-07-26 19:26:55
- Updated at : 2024-07-27 19:26:55
- Link: https://extra-lessons.techidaily.com/mastering-canva-10-best-practices-unveiled/
- License: This work is licensed under CC BY-NC-SA 4.0.