[New] Beginner's Blueprint to Blend, Brighten & Balance
Beginner’s Blueprint to Blend, Brighten & Balance
Adobe Photoshop is known for its advanced key features and options through which professionals enhance their photos with a few retouches. If the captured photo lacks some requirements or includes flaws, people can easily vanish the flaws through Photoshop effortlessly. You can craft any ordinary image into an incredible portrait by utilizing Photoshop smartly.
However, beginners or non-technical individuals who don’t have any idea about using Photoshop may find it challenging to conduct Photoshop editing. This article has been composed to enlist some beneficial tips to use Photoshop editing without facing any inconvenience.
Part 1: 10 Useful Photoshop Photo Editing Tips for Beginners
Have you ever used Photoshop to edit your images? If you are a beginner, read this section to get aware of 10 valuable tips for Photoshop photo editing.
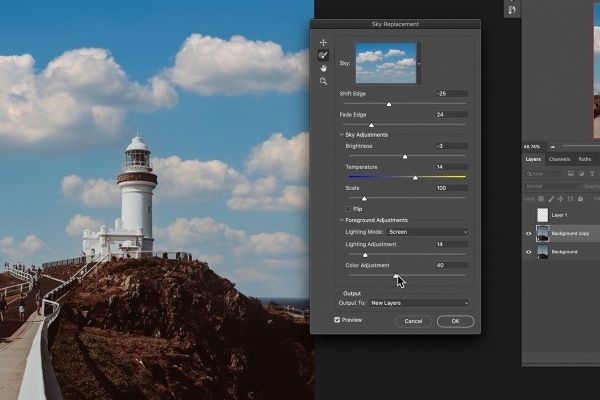
1. Tip 1: Sky Replacement
Do you know that Photoshop image editing can easily replace the sky in your picture with a single click? To use this feature, navigate to “Edit” and then click on “Sky Replacement.” This feature will open its dialog box from which you can easily choose the sky displayed in the “Sky List.”
You can also edit the edges of your sky by heading to “Shift Edge Slider,” from where you can fade in or out the sky edges using the slider. To adjust the brightness, saturation, and temperature of the sky, use the option of “Sky Adjustments.” Keep in mind that Photoshop has two lightning modes that are “Multiple” and “Screen.” Multiply mode is used for dark effects, and Screen mode is used for bright effects on the picture.
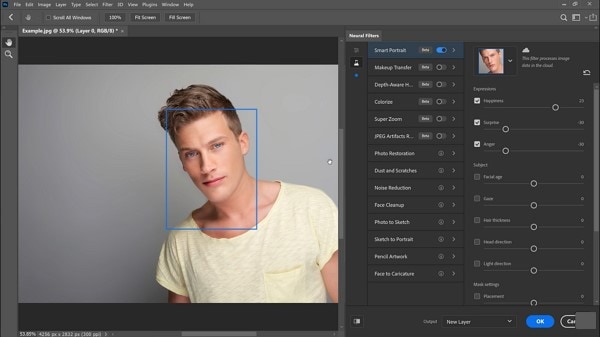
2. Tip 2: Smart Portrait – Neural Filter
The Smart Portrait is one of the exciting features through which you can make people old, young, angry, sad, and surprised. It’s a fun way to explore the features of Photoshop picture editing by creating different emotions on people’s faces. Moreover, you can also change the color of your hair and head willingly.
To use this feature, navigate to “Filter” and then choose “Neural Filters” to explore it. Play around with the settings such as dragging the sliders of emotions such as happy, sad, angry, and many more.
3. Tip 3: Skin Smoothing – Neural Filter
Who does not want to make their skin look glow and smooth in the pictures? Adobe Photoshop comprises neural filters powered by AI through which you can effortlessly smooth your skin with a natural touch. For this, head to “Filter” and then choose “Neural Filter” from the list. Now tap on “Featured Filters” and then select “Skin Smoothing” from the given options.
In this feature, you can use the sliders of “Blur and Smoothness” to adjust the intensity of it. Drag the sliders to manage the smoothness of your skin manually. The ideal way is to increase the smoothness and to keep the blur slider on the lower side for a natural result.

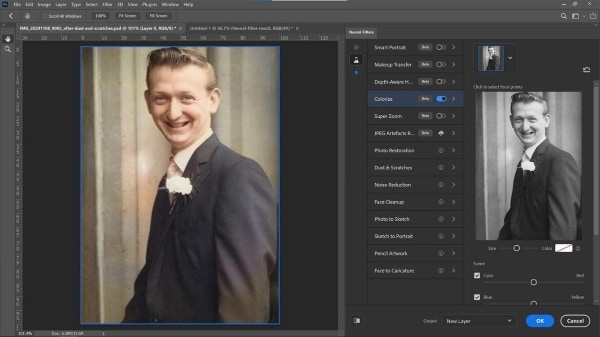
4. Tip 4: Colorize - Neural Filter
To give a cinematic look to your pictures, Photoshop photo editing has introduced this feature to colorize the images into black and white effect. Professionals use this filter to give vintage looks to photos with a single click.
To use this feature, turn on the “RGB Mode” and then click on “Colorize.” The filter will automatically transform your picture into a black and white effect. You can colorize a specific area with a particular area by heading to the ‘Color Box”. Just select the color from the box and tap on the area where you want to apply the color.
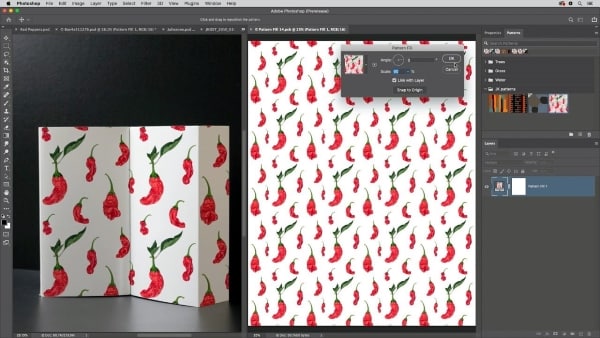
5. Tip 5: Pattern Preview
Do you want to create a seamless pattern for graphic designing? This new feature allows users to craft their desired pattern precisely. For this, go to “View” and then click on “Pattern Preview.” Now start creating the pattern you would like, and this feature will automatically join the points of the pattern to make it look seamless.
Once done with making patterns, navigate to “Edit” and then click on “Define Patterns” to name this specific pattern. To apply your created pattern to the image, use the blending options.
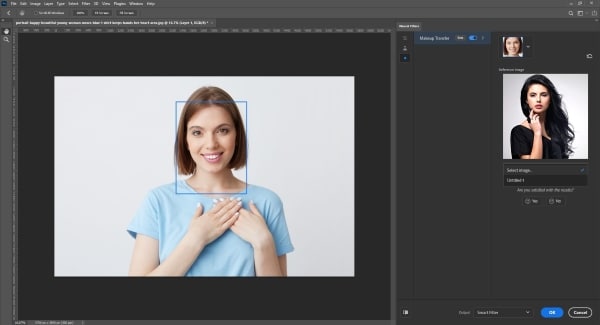
6. Tip 6: Makeup Transfer - Neural Filter
Another impressive neural filter feature of Photoshop editing is makeup transfer. As from the name, this feature can literally transfer the makeup from one image to another. To use this feature, navigate to “Neural Filters” and then turn on the option of “Makeup Transfer.”
On the “Reference Image,” select the image whose makeup you would like to transfer to the existing image. This feature is fun to use, but sometimes it may not generate perfect results.
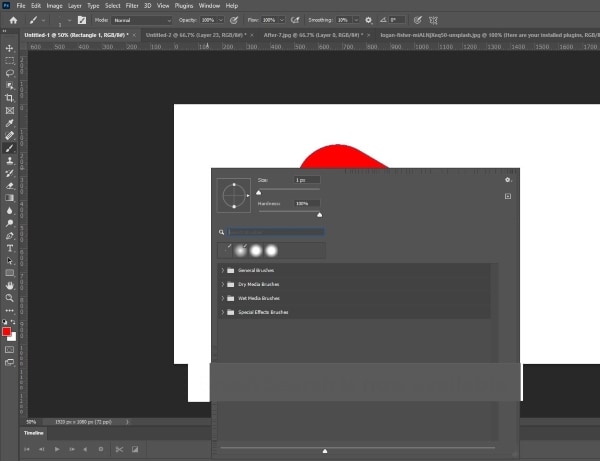
7. Tip 7: Brush Search
It’s hectic always to find the brushes you like and regularly use for graphic designing or to edit images. With Photoshop picture editing, now you can find the brushes you like by searching them. Thus, no need to look around, and you can easily find your brush through a quick search.
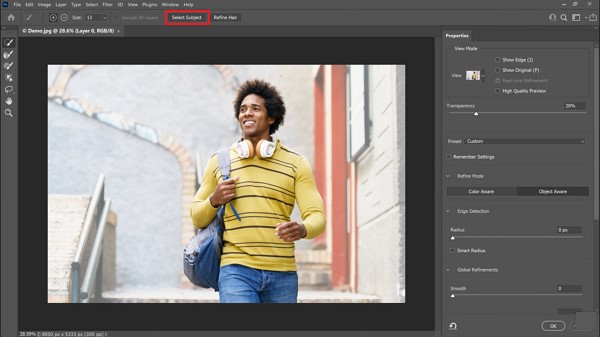
8. Tip 8: Select Subject Improvement
Another upgrade in Photoshop editing is that you can easily select the subject with a single click. By selecting the subject of your image, you can easily do variations in the background. For this, tap on “Select and Mask” and then click “Select Subject.”
Afterward, you can easily change or remove the backgrounds without impacting the subject. To adjust the edges, you can use the refine brush to make the edges smooth of the subject with the background.
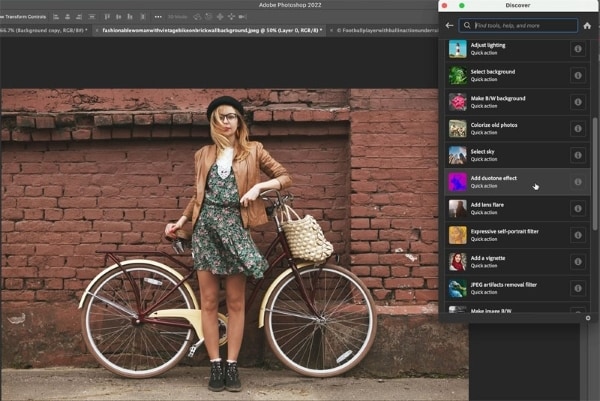
9. Tip 9: Quick Actions
Are you always in a hurry to edit the images? Then use the quick actions option to remove and change the backgrounds easily, and you can also enhance the image. To reach this feature, head to “Help” and then tap on “Photoshop Help” from the given options. Now “Discover” tab will pop up from which you can select the “Quick Actions.”
On this tab, you can see tutorials to execute the editing and can easily make regular adjustments such as blur background, changing the background, and making B/W background.
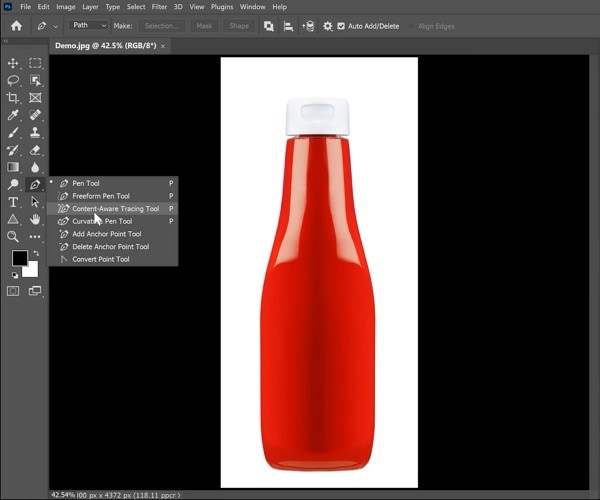
10. Tip 10: Content Aware Tracing Tool
This tool works amazingly on objects and products that have high-defined edges. Through this, you can adjust and manage the minute details of the object with few retouches. You can create and change the path of the edges of your product and can make the object flawless.
To access this particular tool, access the “Pen” tool and tap on the “Pen Tool” group. From its dialog box, select “Content Aware Tracing Tool.” First, select the product according to your preference and then click on a specific part of the object to do the modifications. This tool may not be much helpful for regular images, but professionals can get rid of minor flaws in a product shoot through it.
Conclusion
Without any doubt, Adobe Photoshop is one of the notorious tools to conduct advanced and professional Photoshop photo editing on products, objects, and illustrations. Just through this single platform, you can quickly transform any image into an exceptional one with a few clicks. However, if you are a beginner and do not have command of this tool, use our article as guidance to execute Photoshop editing.
Also read:
- [New] 2024 Approved Essential Enhancements for Terria Pros
- [Updated] 2024 Approved A Beginner's Tutorial on Using LUTs in AR
- [Updated] The Rise of Autofocus Aided HDR Photography for 2024
- Compendium of Different Photographic Gadgets for 2024
- How to Change Lock Screen Wallpaper on Realme Narzo 60 5G
- Image Edition Excellence Tutorial Insights
- Six Best Cinematography Tools in UHD Space
- The Demon of Brownsville Road | Free Book
- The Essential Manual to Acquiring Final Cut Pro Gratis
- The Gradual Volume Curve of Audio Reduction in FL Studio
- The Ultimate Guide to Choosing an Ideal Lightweight Laptop for Remote Working, According to ZDNet Tests
- Unlocking a World of Talent with the Top 10 Low-Cost YouTube Creators for 2024
- Title: [New] Beginner's Blueprint to Blend, Brighten & Balance
- Author: Mark
- Created at : 2025-01-19 17:29:45
- Updated at : 2025-01-26 17:16:04
- Link: https://extra-lessons.techidaily.com/new-beginners-blueprint-to-blend-brighten-and-balance/
- License: This work is licensed under CC BY-NC-SA 4.0.