Pushing Boundaries in Motion Photography
Pushing Boundaries in Motion Photography
How to Make A Hyperlapse Video

Ollie Mattison
Mar 27, 2024• Proven solutions
There are a lot of things you can do to make your videos a bit more dynamic, like including some camera movement. One of the most interesting things you can include in your videos is a time lapse clip. Time lapses are videos where time seems to rush by quickly. Time lapse videos are often of things like the sun setting or traffic in the city and they are usually created by placing your camera in a stable spot, like on a tripod, and either setting it to record a video or to take pictures at regular intervals.
A hyperlapse is a special type of time lapse video where the camera changes positions. When you make a time lapse video you leave your camera in one spot. You might set it up in the window of a vehicle or on top of something that moves, but the camera stays in the spot where you mount it. When you create a hyperlapse video you manually move your camera to different positions.
How to Make A Hyperlapse Video
Time lapse videos are everywhere. Television shows often use time lapses and hyperlapses to establish locations. These usually include city skylines or recognizable landmarks. Time lapse and hyperlapse videos have also become popular on YouTube, Instagram, and other social media sites. Often people are creating them on their phones. This article will explain how.
1. Apps for Creating Hyperlapse Videos
There are several apps for creating time lapse videos, and any of them can be used to create hyperlapses as well. Here are two of the best:
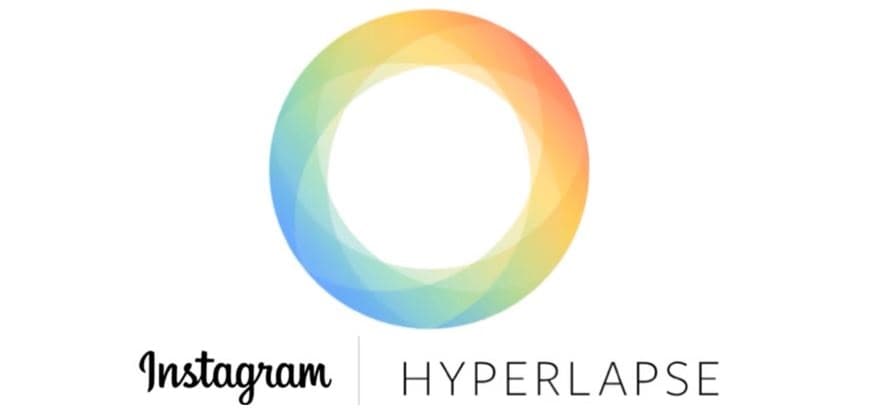
Hyperlapse is also the name of an app created by Instagram for recording time lapse and hyperlapse videos. This app can record up to 45 minutes of footage and then compress it into a much shorter video. The thing that makes Hyperlapse especially good for hyperlapse videos is that it automatically helps to stabilize the footage you record while walking around. As Hyperlapse is an Instagram app all videos are cropped into square shapes. This app is only available for iOS devices.
Lapse It is a great app for users who want to have a lot of control over the look of their videos. Besides recording your hyperlapse video Lapse It allows you to do some editing, like trimming your clips or adding music and filters. You can even import hyperlapse videos recorded with other cameras into Lapse It. There is a free version of Lapse It and a ‘Pro’ version which has more features and costs $1.99. Both versions offer in-app purchases. Lapse It is available for both Android and iOS devices.

For more information on time lapse apps read the entry ‘Best Apps for Time Lapse Videos’.
2. Hyperlapse Videos – The Long Way
Some video creators prefer to create their hyperlapse videos from photographs they take outside of an app. This takes longer, but some people find it more rewarding. First, choose an interesting location to record your hyperlapse and decide on the path you are going to move along. Look at the frame of your first shot and pick out one detail, like a window on a building. When you move your camera try to keep that detail in the same part of your frame.
It may be helpful to set your phone up on a tripod or monopod to keep it at the right level and stop it from shaking while you take your photos. You could also place the handle of a selfie stick on the ground and use it as a monopod.
To create your hyperlapse you will need to take even steps and snap a photo every time you move. You will end up with a huge number of photos which you will need to edit and compile into a video.
It is a good idea to edit your photos in a program like Lightroom before importing them into a video editing program. In Lightroom you can edit only one image and apply the same specs to the rest.
Ollie Mattison
Ollie Mattison is a writer and a lover of all things video.
Follow @Ollie Mattison
Ollie Mattison
Mar 27, 2024• Proven solutions
There are a lot of things you can do to make your videos a bit more dynamic, like including some camera movement. One of the most interesting things you can include in your videos is a time lapse clip. Time lapses are videos where time seems to rush by quickly. Time lapse videos are often of things like the sun setting or traffic in the city and they are usually created by placing your camera in a stable spot, like on a tripod, and either setting it to record a video or to take pictures at regular intervals.
A hyperlapse is a special type of time lapse video where the camera changes positions. When you make a time lapse video you leave your camera in one spot. You might set it up in the window of a vehicle or on top of something that moves, but the camera stays in the spot where you mount it. When you create a hyperlapse video you manually move your camera to different positions.
How to Make A Hyperlapse Video
Time lapse videos are everywhere. Television shows often use time lapses and hyperlapses to establish locations. These usually include city skylines or recognizable landmarks. Time lapse and hyperlapse videos have also become popular on YouTube, Instagram, and other social media sites. Often people are creating them on their phones. This article will explain how.
1. Apps for Creating Hyperlapse Videos
There are several apps for creating time lapse videos, and any of them can be used to create hyperlapses as well. Here are two of the best:
Hyperlapse is also the name of an app created by Instagram for recording time lapse and hyperlapse videos. This app can record up to 45 minutes of footage and then compress it into a much shorter video. The thing that makes Hyperlapse especially good for hyperlapse videos is that it automatically helps to stabilize the footage you record while walking around. As Hyperlapse is an Instagram app all videos are cropped into square shapes. This app is only available for iOS devices.
Lapse It is a great app for users who want to have a lot of control over the look of their videos. Besides recording your hyperlapse video Lapse It allows you to do some editing, like trimming your clips or adding music and filters. You can even import hyperlapse videos recorded with other cameras into Lapse It. There is a free version of Lapse It and a ‘Pro’ version which has more features and costs $1.99. Both versions offer in-app purchases. Lapse It is available for both Android and iOS devices.
For more information on time lapse apps read the entry ‘Best Apps for Time Lapse Videos’.
2. Hyperlapse Videos – The Long Way
Some video creators prefer to create their hyperlapse videos from photographs they take outside of an app. This takes longer, but some people find it more rewarding. First, choose an interesting location to record your hyperlapse and decide on the path you are going to move along. Look at the frame of your first shot and pick out one detail, like a window on a building. When you move your camera try to keep that detail in the same part of your frame.
It may be helpful to set your phone up on a tripod or monopod to keep it at the right level and stop it from shaking while you take your photos. You could also place the handle of a selfie stick on the ground and use it as a monopod.
To create your hyperlapse you will need to take even steps and snap a photo every time you move. You will end up with a huge number of photos which you will need to edit and compile into a video.
It is a good idea to edit your photos in a program like Lightroom before importing them into a video editing program. In Lightroom you can edit only one image and apply the same specs to the rest.
Ollie Mattison
Ollie Mattison is a writer and a lover of all things video.
Follow @Ollie Mattison
Also read:
- [New] Transition Your Tunes Transferring Collections Between Services
- [Updated] A Year in Review Exploring VivaCut’s Evolution and Its Video Editor’s Guide
- 10 Open Source Video Players for Linux, Windows and Mac for 2024
- 2024 Approved Best Way to Perform OBS Streaming
- 2024 Approved Canvas Kids Discover 10 Free, Kid-Friendly Art Makers for Mac
- 2024 Approved Copyrighted Chords Navigating Music Uploads to Insta
- 2024 Approved Enhance Your Audio-Visual Experience with These 6 Apps
- Avoid Virtual Reality Queasiness 5 Useful Tips for 2024
- ENTERING INTO THE SECRETS OF GOD | Free Book
- In 2024, How To Activate and Use Life360 Ghost Mode On Vivo Y100t | Dr.fone
- Navigating PowerToys for Efficient File Locking
- Premium Webcams for Professional Sound Recording
- Remove FRP Lock on 90 Lite
- Tackling Virtual Machine's RAM Shortage on PCs
- The Archivist's Guide Reviving Yesteryear’s VHS Artistry in Today's Editing Space
- Title: Pushing Boundaries in Motion Photography
- Author: Mark
- Created at : 2024-12-22 19:06:46
- Updated at : 2024-12-23 16:42:54
- Link: https://extra-lessons.techidaily.com/pushing-boundaries-in-motion-photography/
- License: This work is licensed under CC BY-NC-SA 4.0.