
"The Complete Resource for High-Quality Videos in GoPro Studio"
The Complete Resource for High-Quality Videos in GoPro Studio
Complete Guide to Edit a Video with GoPro Studio

Ollie Mattison
Mar 27, 2024• Proven solutions
GoPro Studio software is one of the main products that are provided by the GoPro. This software has made all the things easy to do whether it is importing the GoPro media, Play back videos, viewing videos/photos or creating professional quality videos. Gopro Studio has made the video editing much easy that even beginners can edit the GoPro videos effectively. In the end, we will also give you three alternatives to GoPro.
You may also like:
Best GoPro Studio Alternatives >>
Color Correction in GoPro Studio >>
GoPro Studio is a very basic video editing for your action camera clips, if you want a video editing software more advanced, you can try Wondershare Filmora which allows you to merge and cut your action camera videos within clicks without quality loss.


Whether you want to trim the GoPro video clips to make them short or want to mix multiple clips; GoPro Studio will make you learn that in an easy way. Other things that you are going to learn through this software are adding titles, music, motion effects and more on you GoPro videos. In short, you can say that it is complete video editing software that enables you to create stunning GoPro videos and enhance your video editing skills.
In this article, we are going to explain the steps for editing a video with GoPro Studio. Before starting video editing, you need to import videos to your computer from the GoPro. Steps for complete video editing are explained below.
Part 1: How to Edit GoPro Videos with GoPro Studio
1. Importing videos
First step for editing is importing the video files from the GoPro. Open the GoPro Studio and then, you will find a blue colour button on the top left corner of the window labelled as “Import New Files”. Click on that button and select the files that you want to include.
 CalendarBudget - Monthly subscription membership to CalendarBudget via web browser or mobile app. Support included.
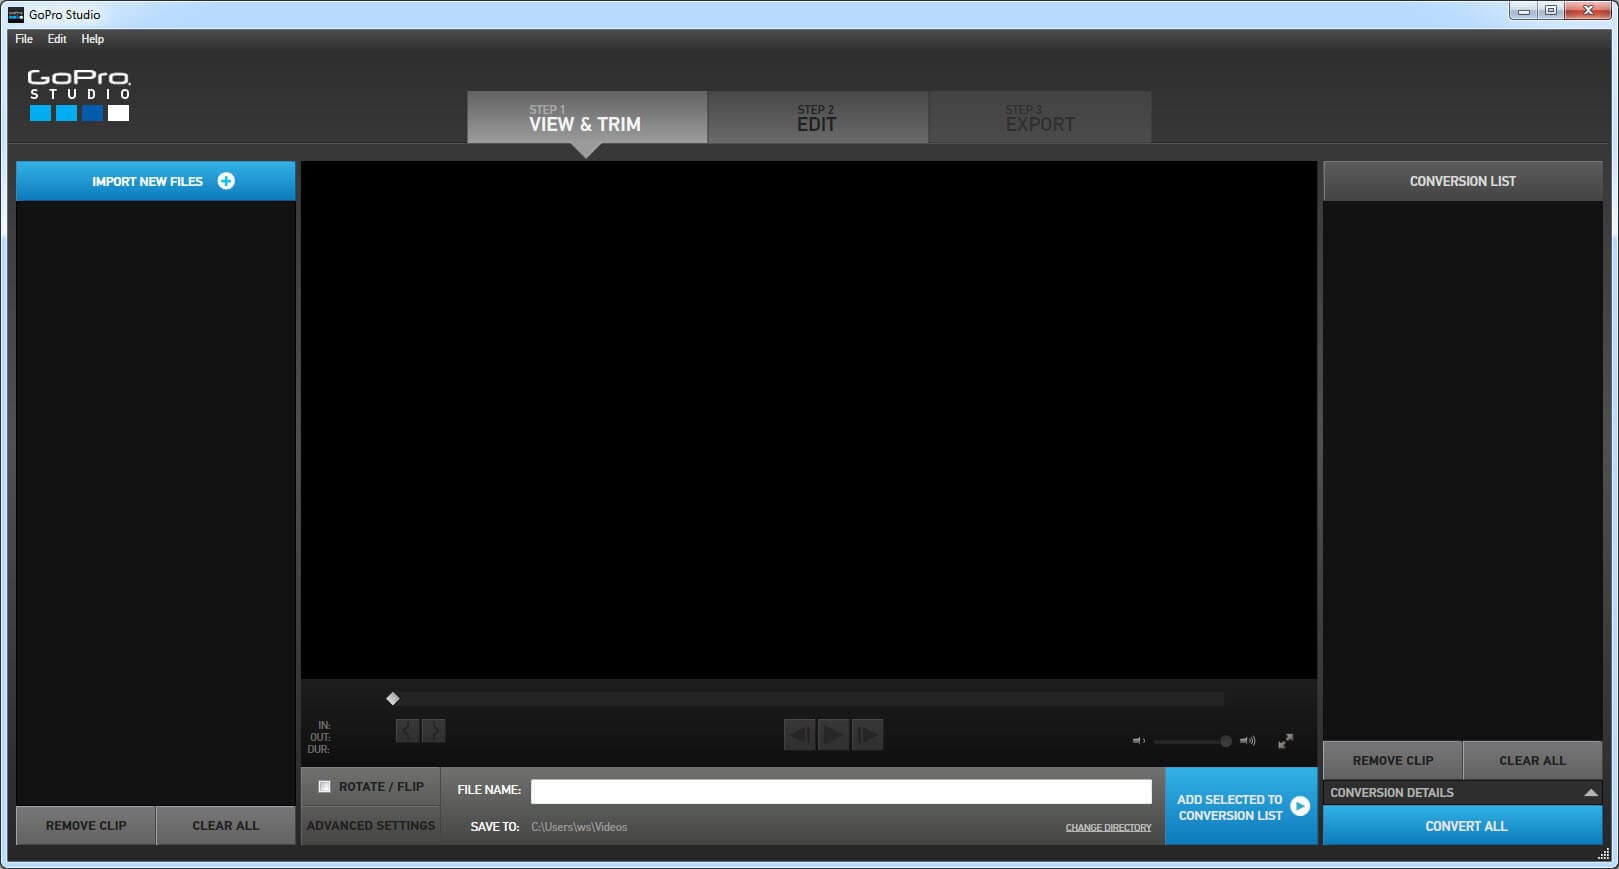
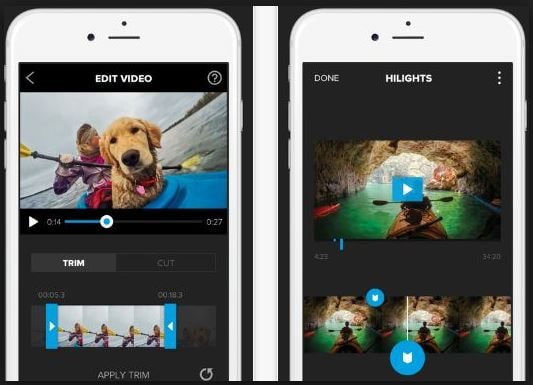
2. Trimming
After you have imported the videos, cut the unnecessary portion of the videos that you are not interested to include, this trimming or cutting should be done before you start the actual editing.
For that, click on the thumbnails of the videos and then on “play”. This will result into playing the video. There are two trimming buttons on the left of the window that you can use for marking the beginning and ending of the clip which you want to include. In this way, you can select the number of videos clips that you want to include in your video.

3. Changing video settings
If you want to change any setting like frames per second, size of the video, change format, increasing speed or any other setting; you can go to advanced settings and make the changes. Don’t forget to click on “remember setting” button after you have made the settings otherwise it will not save the settings that you would have made.

4. Adding files to convert list
Now, you need to add the roughly trimmed files to the conversion list so that you can start with the editing. For that select the clip and then, go to “Add Clip To Conversion List”. In this way, add all the clips one by one to the list and they will appear on the right column of the GoPro window when added. In this step, you are also enabled to add the new videos, trim them at the moment and rotate them. Once you have added all the clips to conversion list, convert them by clicking on “Convert All” button.
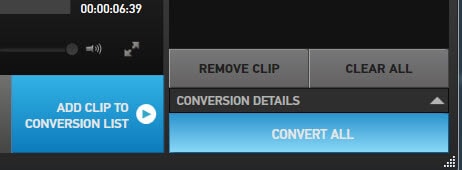
On the completion of conversion, a pop up message labelled as “Proceed to Step 2” will appear on the screen and you need to click on that for proceeding to editing mode.

5. Adding Title
Now, GoPro Studio will offer you two options; creating a totally new video or using the templates in the software. In the case you choose the second option, you need to do only one thing which is replacing the videos with the selected files.

For creating the new video, click on “Blank” button and then on “create”. Now, click on the “Title” button and type the title name that you want. You can also change the font size, colour and some other features of the title. After finalising the title, drag it to the “Drag videos here” option and if you want it to appear in the video, then you can drag it to “Drag title here”.

6. Adding and Editing the video
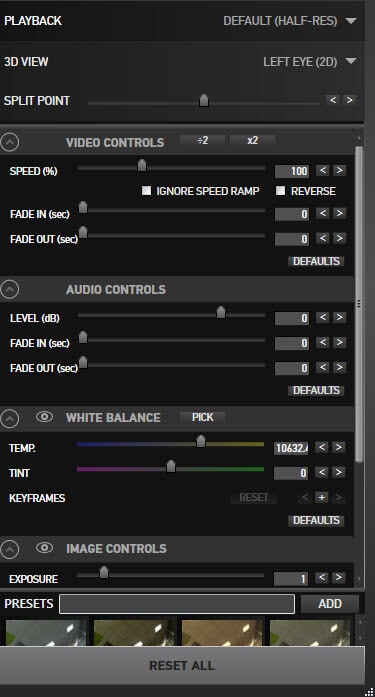
Now, choose the video and add it by dragging and dropping to the timeline. After including the video, you can adjust the speed, fade time, brightness, volume level and many other features. You can also add the night vision feel to the video. As you have done in the importing; you can also adjust the duration of every clip that you are going to add in the video. Selecting the “Razor blade” symbol will divide the clip in two parts and if you click on “+”symbol, it will create the the fade effects in the video. The fade out effects are added so that the video will not end suddenly. So, when done with adding the clips then, add the fade out effect to the video. Click on the “Video Controls” and increase the limit on the fade out line.
7. Adding music
Adding music is like adding the other features, just click on “Media” and select the audio file that you want to add. You can also recordings in your own voice.

8. Exporting the video
After finishing the editing, you can export the video to the format you want. Like, you can directly upload it on the YouTube or Vimeo, save it for watching later on your PC or set other parameters by choosing the custom options. After selecting the particular option, click on the “Export” button.

Now, video editing is over and you can watch it on your smartphone, PC and even can show to your friends and family.
Part 2: 3 Alternatives to GoPro Video Editor
1. Lightworks
Are you thinking how to edit GoPro videos? Try out Lightworks that is one of the best tools to edit GoPro video and the most trusted one since 25yrs. It has been used to edit some of the finest films in the history of cinema like the LA Confidential, Wolf of Wall Street, etc. Whether a 4K film project or a YouTube video or a video for social media, Lightsworks definitely is one of the best of all with a simple user interface and easy trimming and editing timeline.
Features:
- Easily repire shaky videos
- It covers any video format
Supported platform: Win/Mac/Linux
Price: Free
Size: 93 M
2. Splice
Creating professional videos is easy with Splice. If you wish to edit GoPro videos on your iPad or iPhone, Splice is one of the best editing tools that you may try. From speed control to animations, and various transitions and addition of music, Splice offers customized video in no time.
Features:
- Sync your video to music auto
- Easily adjust fast or slow motion
Supported platform: iPhone/iPad
Price: Free to use
Size: 123.1 M
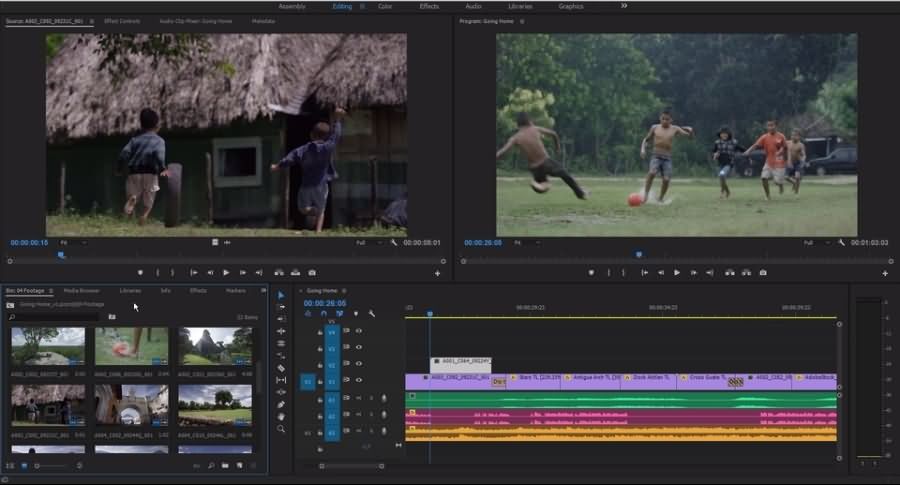
3. Adobe Premiere
Often how to edit GoPro videos becomes a reason for concern. But, you need not worry as the Adobe Premiere Pro tool helps you to turn the raw video clips into flawless production in a matter of no few seconds. Refining audio or adjusting color or any other transitional effect is very simple whenever you wish to edit GoPro videos with the Adobe Premiere tool.
Features:
- Intuitive interface to use
- Offers immersive 360/VR effects
Supported platform: Win/Mac
Price: $9.99/$20.99/$52.99/$92.98
Size: 1.01 G
Conclusion
If editing video clips in GoPro is not what you want, you can use some best video editing software for GoPro videos . Here we recommend you to try Wondershare Filmora . Apart from the basic video editing features, you can also perform some advanced features in Filmora, such as stabilize the shaky GoPro videos . Watch the video below to check what Filmora can do for you.

Ollie Mattison
Ollie Mattison is a writer and a lover of all things video.
Follow @Ollie Mattison
Ollie Mattison
Mar 27, 2024• Proven solutions
GoPro Studio software is one of the main products that are provided by the GoPro. This software has made all the things easy to do whether it is importing the GoPro media, Play back videos, viewing videos/photos or creating professional quality videos. Gopro Studio has made the video editing much easy that even beginners can edit the GoPro videos effectively. In the end, we will also give you three alternatives to GoPro.
You may also like:
Best GoPro Studio Alternatives >>
Color Correction in GoPro Studio >>
GoPro Studio is a very basic video editing for your action camera clips, if you want a video editing software more advanced, you can try Wondershare Filmora which allows you to merge and cut your action camera videos within clicks without quality loss.

Whether you want to trim the GoPro video clips to make them short or want to mix multiple clips; GoPro Studio will make you learn that in an easy way. Other things that you are going to learn through this software are adding titles, music, motion effects and more on you GoPro videos. In short, you can say that it is complete video editing software that enables you to create stunning GoPro videos and enhance your video editing skills.
In this article, we are going to explain the steps for editing a video with GoPro Studio. Before starting video editing, you need to import videos to your computer from the GoPro. Steps for complete video editing are explained below.

Part 1: How to Edit GoPro Videos with GoPro Studio
1. Importing videos
First step for editing is importing the video files from the GoPro. Open the GoPro Studio and then, you will find a blue colour button on the top left corner of the window labelled as “Import New Files”. Click on that button and select the files that you want to include.
2. Trimming
After you have imported the videos, cut the unnecessary portion of the videos that you are not interested to include, this trimming or cutting should be done before you start the actual editing.
For that, click on the thumbnails of the videos and then on “play”. This will result into playing the video. There are two trimming buttons on the left of the window that you can use for marking the beginning and ending of the clip which you want to include. In this way, you can select the number of videos clips that you want to include in your video.
3. Changing video settings
If you want to change any setting like frames per second, size of the video, change format, increasing speed or any other setting; you can go to advanced settings and make the changes. Don’t forget to click on “remember setting” button after you have made the settings otherwise it will not save the settings that you would have made.
4. Adding files to convert list
Now, you need to add the roughly trimmed files to the conversion list so that you can start with the editing. For that select the clip and then, go to “Add Clip To Conversion List”. In this way, add all the clips one by one to the list and they will appear on the right column of the GoPro window when added. In this step, you are also enabled to add the new videos, trim them at the moment and rotate them. Once you have added all the clips to conversion list, convert them by clicking on “Convert All” button.
 Video Converter Factory Pro
On the completion of conversion, a pop up message labelled as “Proceed to Step 2” will appear on the screen and you need to click on that for proceeding to editing mode.
5. Adding Title
Now, GoPro Studio will offer you two options; creating a totally new video or using the templates in the software. In the case you choose the second option, you need to do only one thing which is replacing the videos with the selected files.
For creating the new video, click on “Blank” button and then on “create”. Now, click on the “Title” button and type the title name that you want. You can also change the font size, colour and some other features of the title. After finalising the title, drag it to the “Drag videos here” option and if you want it to appear in the video, then you can drag it to “Drag title here”.
6. Adding and Editing the video
Now, choose the video and add it by dragging and dropping to the timeline. After including the video, you can adjust the speed, fade time, brightness, volume level and many other features. You can also add the night vision feel to the video. As you have done in the importing; you can also adjust the duration of every clip that you are going to add in the video. Selecting the “Razor blade” symbol will divide the clip in two parts and if you click on “+”symbol, it will create the the fade effects in the video. The fade out effects are added so that the video will not end suddenly. So, when done with adding the clips then, add the fade out effect to the video. Click on the “Video Controls” and increase the limit on the fade out line.
7. Adding music
Adding music is like adding the other features, just click on “Media” and select the audio file that you want to add. You can also recordings in your own voice.
8. Exporting the video
After finishing the editing, you can export the video to the format you want. Like, you can directly upload it on the YouTube or Vimeo, save it for watching later on your PC or set other parameters by choosing the custom options. After selecting the particular option, click on the “Export” button.
Now, video editing is over and you can watch it on your smartphone, PC and even can show to your friends and family.

Part 2: 3 Alternatives to GoPro Video Editor
1. Lightworks
Are you thinking how to edit GoPro videos? Try out Lightworks that is one of the best tools to edit GoPro video and the most trusted one since 25yrs. It has been used to edit some of the finest films in the history of cinema like the LA Confidential, Wolf of Wall Street, etc. Whether a 4K film project or a YouTube video or a video for social media, Lightsworks definitely is one of the best of all with a simple user interface and easy trimming and editing timeline.
Features:
- Easily repire shaky videos
- It covers any video format
Supported platform: Win/Mac/Linux
Price: Free
Size: 93 M


2. Splice
Creating professional videos is easy with Splice. If you wish to edit GoPro videos on your iPad or iPhone, Splice is one of the best editing tools that you may try. From speed control to animations, and various transitions and addition of music, Splice offers customized video in no time.
Features:
- Sync your video to music auto
- Easily adjust fast or slow motion
Supported platform: iPhone/iPad
Price: Free to use
Size: 123.1 M
3. Adobe Premiere
Often how to edit GoPro videos becomes a reason for concern. But, you need not worry as the Adobe Premiere Pro tool helps you to turn the raw video clips into flawless production in a matter of no few seconds. Refining audio or adjusting color or any other transitional effect is very simple whenever you wish to edit GoPro videos with the Adobe Premiere tool.
Features:
- Intuitive interface to use
- Offers immersive 360/VR effects
Supported platform: Win/Mac
Price: $9.99/$20.99/$52.99/$92.98
Size: 1.01 G
Conclusion
If editing video clips in GoPro is not what you want, you can use some best video editing software for GoPro videos . Here we recommend you to try Wondershare Filmora . Apart from the basic video editing features, you can also perform some advanced features in Filmora, such as stabilize the shaky GoPro videos . Watch the video below to check what Filmora can do for you.

Ollie Mattison
Ollie Mattison is a writer and a lover of all things video.
Follow @Ollie Mattison
Ollie Mattison
Mar 27, 2024• Proven solutions
GoPro Studio software is one of the main products that are provided by the GoPro. This software has made all the things easy to do whether it is importing the GoPro media, Play back videos, viewing videos/photos or creating professional quality videos. Gopro Studio has made the video editing much easy that even beginners can edit the GoPro videos effectively. In the end, we will also give you three alternatives to GoPro.
You may also like:
Best GoPro Studio Alternatives >>
Color Correction in GoPro Studio >>
GoPro Studio is a very basic video editing for your action camera clips, if you want a video editing software more advanced, you can try Wondershare Filmora which allows you to merge and cut your action camera videos within clicks without quality loss.
Whether you want to trim the GoPro video clips to make them short or want to mix multiple clips; GoPro Studio will make you learn that in an easy way. Other things that you are going to learn through this software are adding titles, music, motion effects and more on you GoPro videos. In short, you can say that it is complete video editing software that enables you to create stunning GoPro videos and enhance your video editing skills.
In this article, we are going to explain the steps for editing a video with GoPro Studio. Before starting video editing, you need to import videos to your computer from the GoPro. Steps for complete video editing are explained below.
Part 1: How to Edit GoPro Videos with GoPro Studio
1. Importing videos
First step for editing is importing the video files from the GoPro. Open the GoPro Studio and then, you will find a blue colour button on the top left corner of the window labelled as “Import New Files”. Click on that button and select the files that you want to include.
2. Trimming
After you have imported the videos, cut the unnecessary portion of the videos that you are not interested to include, this trimming or cutting should be done before you start the actual editing.
For that, click on the thumbnails of the videos and then on “play”. This will result into playing the video. There are two trimming buttons on the left of the window that you can use for marking the beginning and ending of the clip which you want to include. In this way, you can select the number of videos clips that you want to include in your video.
 Project Manager - Asset Browser for 3Ds Max
3. Changing video settings
If you want to change any setting like frames per second, size of the video, change format, increasing speed or any other setting; you can go to advanced settings and make the changes. Don’t forget to click on “remember setting” button after you have made the settings otherwise it will not save the settings that you would have made.

4. Adding files to convert list
Now, you need to add the roughly trimmed files to the conversion list so that you can start with the editing. For that select the clip and then, go to “Add Clip To Conversion List”. In this way, add all the clips one by one to the list and they will appear on the right column of the GoPro window when added. In this step, you are also enabled to add the new videos, trim them at the moment and rotate them. Once you have added all the clips to conversion list, convert them by clicking on “Convert All” button.
On the completion of conversion, a pop up message labelled as “Proceed to Step 2” will appear on the screen and you need to click on that for proceeding to editing mode.
5. Adding Title
Now, GoPro Studio will offer you two options; creating a totally new video or using the templates in the software. In the case you choose the second option, you need to do only one thing which is replacing the videos with the selected files.
For creating the new video, click on “Blank” button and then on “create”. Now, click on the “Title” button and type the title name that you want. You can also change the font size, colour and some other features of the title. After finalising the title, drag it to the “Drag videos here” option and if you want it to appear in the video, then you can drag it to “Drag title here”.
6. Adding and Editing the video
Now, choose the video and add it by dragging and dropping to the timeline. After including the video, you can adjust the speed, fade time, brightness, volume level and many other features. You can also add the night vision feel to the video. As you have done in the importing; you can also adjust the duration of every clip that you are going to add in the video. Selecting the “Razor blade” symbol will divide the clip in two parts and if you click on “+”symbol, it will create the the fade effects in the video. The fade out effects are added so that the video will not end suddenly. So, when done with adding the clips then, add the fade out effect to the video. Click on the “Video Controls” and increase the limit on the fade out line.
7. Adding music
Adding music is like adding the other features, just click on “Media” and select the audio file that you want to add. You can also recordings in your own voice.

8. Exporting the video
After finishing the editing, you can export the video to the format you want. Like, you can directly upload it on the YouTube or Vimeo, save it for watching later on your PC or set other parameters by choosing the custom options. After selecting the particular option, click on the “Export” button.
Now, video editing is over and you can watch it on your smartphone, PC and even can show to your friends and family.
 Lyric Video Creator Professional Version
Part 2: 3 Alternatives to GoPro Video Editor
1. Lightworks
Are you thinking how to edit GoPro videos? Try out Lightworks that is one of the best tools to edit GoPro video and the most trusted one since 25yrs. It has been used to edit some of the finest films in the history of cinema like the LA Confidential, Wolf of Wall Street, etc. Whether a 4K film project or a YouTube video or a video for social media, Lightsworks definitely is one of the best of all with a simple user interface and easy trimming and editing timeline.
Features:
- Easily repire shaky videos
- It covers any video format
Supported platform: Win/Mac/Linux
Price: Free
Size: 93 M

2. Splice
Creating professional videos is easy with Splice. If you wish to edit GoPro videos on your iPad or iPhone, Splice is one of the best editing tools that you may try. From speed control to animations, and various transitions and addition of music, Splice offers customized video in no time.
Features:
- Sync your video to music auto
- Easily adjust fast or slow motion
Supported platform: iPhone/iPad
Price: Free to use
Size: 123.1 M
3. Adobe Premiere
Often how to edit GoPro videos becomes a reason for concern. But, you need not worry as the Adobe Premiere Pro tool helps you to turn the raw video clips into flawless production in a matter of no few seconds. Refining audio or adjusting color or any other transitional effect is very simple whenever you wish to edit GoPro videos with the Adobe Premiere tool.
Features:
- Intuitive interface to use
- Offers immersive 360/VR effects
Supported platform: Win/Mac
Price: $9.99/$20.99/$52.99/$92.98
Size: 1.01 G
 SwifDoo PDF Perpetual (2-PC) Free upgrade. No monthly fees ever.
Conclusion
If editing video clips in GoPro is not what you want, you can use some best video editing software for GoPro videos . Here we recommend you to try Wondershare Filmora . Apart from the basic video editing features, you can also perform some advanced features in Filmora, such as stabilize the shaky GoPro videos . Watch the video below to check what Filmora can do for you.

Ollie Mattison
Ollie Mattison is a writer and a lover of all things video.
Follow @Ollie Mattison
Ollie Mattison
Mar 27, 2024• Proven solutions
GoPro Studio software is one of the main products that are provided by the GoPro. This software has made all the things easy to do whether it is importing the GoPro media, Play back videos, viewing videos/photos or creating professional quality videos. Gopro Studio has made the video editing much easy that even beginners can edit the GoPro videos effectively. In the end, we will also give you three alternatives to GoPro.
You may also like:
Best GoPro Studio Alternatives >>
Color Correction in GoPro Studio >>
GoPro Studio is a very basic video editing for your action camera clips, if you want a video editing software more advanced, you can try Wondershare Filmora which allows you to merge and cut your action camera videos within clicks without quality loss.
Whether you want to trim the GoPro video clips to make them short or want to mix multiple clips; GoPro Studio will make you learn that in an easy way. Other things that you are going to learn through this software are adding titles, music, motion effects and more on you GoPro videos. In short, you can say that it is complete video editing software that enables you to create stunning GoPro videos and enhance your video editing skills.
In this article, we are going to explain the steps for editing a video with GoPro Studio. Before starting video editing, you need to import videos to your computer from the GoPro. Steps for complete video editing are explained below.
Part 1: How to Edit GoPro Videos with GoPro Studio
1. Importing videos
First step for editing is importing the video files from the GoPro. Open the GoPro Studio and then, you will find a blue colour button on the top left corner of the window labelled as “Import New Files”. Click on that button and select the files that you want to include.
2. Trimming
After you have imported the videos, cut the unnecessary portion of the videos that you are not interested to include, this trimming or cutting should be done before you start the actual editing.
For that, click on the thumbnails of the videos and then on “play”. This will result into playing the video. There are two trimming buttons on the left of the window that you can use for marking the beginning and ending of the clip which you want to include. In this way, you can select the number of videos clips that you want to include in your video.

3. Changing video settings
If you want to change any setting like frames per second, size of the video, change format, increasing speed or any other setting; you can go to advanced settings and make the changes. Don’t forget to click on “remember setting” button after you have made the settings otherwise it will not save the settings that you would have made.
4. Adding files to convert list
Now, you need to add the roughly trimmed files to the conversion list so that you can start with the editing. For that select the clip and then, go to “Add Clip To Conversion List”. In this way, add all the clips one by one to the list and they will appear on the right column of the GoPro window when added. In this step, you are also enabled to add the new videos, trim them at the moment and rotate them. Once you have added all the clips to conversion list, convert them by clicking on “Convert All” button.
On the completion of conversion, a pop up message labelled as “Proceed to Step 2” will appear on the screen and you need to click on that for proceeding to editing mode.
5. Adding Title
Now, GoPro Studio will offer you two options; creating a totally new video or using the templates in the software. In the case you choose the second option, you need to do only one thing which is replacing the videos with the selected files.
For creating the new video, click on “Blank” button and then on “create”. Now, click on the “Title” button and type the title name that you want. You can also change the font size, colour and some other features of the title. After finalising the title, drag it to the “Drag videos here” option and if you want it to appear in the video, then you can drag it to “Drag title here”.
 Easy GIF Animator is a powerful animated GIF editor and the top tool for creating animated pictures, banners, buttons and GIF videos. You get extensive animation editing features, animation effects, unmatched image quality and optimization for the web. No other GIF animation software matches our features and ease of use, that’s why Easy GIF Animator is so popular.
6. Adding and Editing the video
Now, choose the video and add it by dragging and dropping to the timeline. After including the video, you can adjust the speed, fade time, brightness, volume level and many other features. You can also add the night vision feel to the video. As you have done in the importing; you can also adjust the duration of every clip that you are going to add in the video. Selecting the “Razor blade” symbol will divide the clip in two parts and if you click on “+”symbol, it will create the the fade effects in the video. The fade out effects are added so that the video will not end suddenly. So, when done with adding the clips then, add the fade out effect to the video. Click on the “Video Controls” and increase the limit on the fade out line.
7. Adding music
Adding music is like adding the other features, just click on “Media” and select the audio file that you want to add. You can also recordings in your own voice.
8. Exporting the video
After finishing the editing, you can export the video to the format you want. Like, you can directly upload it on the YouTube or Vimeo, save it for watching later on your PC or set other parameters by choosing the custom options. After selecting the particular option, click on the “Export” button.
Now, video editing is over and you can watch it on your smartphone, PC and even can show to your friends and family.
Part 2: 3 Alternatives to GoPro Video Editor
1. Lightworks
Are you thinking how to edit GoPro videos? Try out Lightworks that is one of the best tools to edit GoPro video and the most trusted one since 25yrs. It has been used to edit some of the finest films in the history of cinema like the LA Confidential, Wolf of Wall Street, etc. Whether a 4K film project or a YouTube video or a video for social media, Lightsworks definitely is one of the best of all with a simple user interface and easy trimming and editing timeline.
Features:
- Easily repire shaky videos
- It covers any video format
Supported platform: Win/Mac/Linux
Price: Free
Size: 93 M
2. Splice
Creating professional videos is easy with Splice. If you wish to edit GoPro videos on your iPad or iPhone, Splice is one of the best editing tools that you may try. From speed control to animations, and various transitions and addition of music, Splice offers customized video in no time.
Features:
- Sync your video to music auto
- Easily adjust fast or slow motion
Supported platform: iPhone/iPad
Price: Free to use
Size: 123.1 M
![]() FX PRO (Gold Robot + Silver Robot(Basic Package))
FX PRO (Gold Robot + Silver Robot(Basic Package))
3. Adobe Premiere
Often how to edit GoPro videos becomes a reason for concern. But, you need not worry as the Adobe Premiere Pro tool helps you to turn the raw video clips into flawless production in a matter of no few seconds. Refining audio or adjusting color or any other transitional effect is very simple whenever you wish to edit GoPro videos with the Adobe Premiere tool.
Features:
- Intuitive interface to use
- Offers immersive 360/VR effects
Supported platform: Win/Mac
Price: $9.99/$20.99/$52.99/$92.98
Size: 1.01 G
Conclusion
If editing video clips in GoPro is not what you want, you can use some best video editing software for GoPro videos . Here we recommend you to try Wondershare Filmora . Apart from the basic video editing features, you can also perform some advanced features in Filmora, such as stabilize the shaky GoPro videos . Watch the video below to check what Filmora can do for you.

Key features:
• Import from any devices and cams, including GoPro and drones. All formats supported. Сurrently the only free video editor that allows users to export in a new H265/HEVC codec, something essential for those working with 4K and HD.
• Everything for hassle-free basic editing: cut, crop and merge files, add titles and favorite music
• Visual effects, advanced color correction and trendy Instagram-like filters
• All multimedia processing done from one app: video editing capabilities reinforced by a video converter, a screen capture, a video capture, a disc burner and a YouTube uploader
• Non-linear editing: edit several files with simultaneously
• Easy export to social networks: special profiles for YouTube, Facebook, Vimeo, Twitter and Instagram
• High quality export – no conversion quality loss, double export speed even of HD files due to hardware acceleration
• Stabilization tool will turn shaky or jittery footage into a more stable video automatically.
• Essential toolset for professional video editing: blending modes, Mask tool, advanced multiple-color Chroma Key
Ollie Mattison
Ollie Mattison is a writer and a lover of all things video.
Follow @Ollie Mattison
- Title: The Complete Resource for High-Quality Videos in GoPro Studio
- Author: Mark
- Created at : 2024-07-26 17:42:13
- Updated at : 2024-07-27 17:42:13
- Link: https://extra-lessons.techidaily.com/the-complete-resource-for-high-quality-videos-in-gopro-studio/
- License: This work is licensed under CC BY-NC-SA 4.0.