![[Updated] Captivating Clips Incorporating Text Deformation Artistry](https://thmb.techidaily.com/6b70f639163cfe01d6518c08ef2693a5f686b7373d5c47d7a53f258bef450907.jpg)
"[Updated] Captivating Clips Incorporating Text Deformation Artistry"
Captivating Clips: Incorporating Text Deformation Artistry
Create High-Quality Video - Wondershare Filmora
An easy and powerful YouTube video editor
Numerous video and audio effects to choose from
Detailed tutorials are provided by the official channel
Over the past few years, distortion effects have become popular. People also apply distortion effects on text to make it stand out. You can use this effect on both video and photography. In this blog post, we’ll look at how to distort the text in photography and video. We have also provided a list of free text distorters.
In this article
02 How to Distort Text in Photography Using Photoshop
03 How to Distort Text in Video?
 PCDJ DEX 3 for Windows & MAC is the total entertainment DJ software solution, offering audio, video, and karaoke mixing ability. Automatic beat-sync, smart looping, 4 decks, DJ MIDI controller support, Karaoke Streaming and much more.
What Is Text Distortion?
Distortion of text is referred to as the alteration of the original characteristics or shape of a text. Most people use text distortion to add uniqueness to their photos or videos and make sure their projects stand out from the pack.

How to Distort Text in Photography Using Photoshop
If you are looking for ways to combine art and words, Photoshop offers the right tools to help you add creative effects to text. You can apply text distortion to product logos, headers for a blog, or headers you would like to use in other marketing materials to make them stand out.
By typing normal characters and applying changes with a few clicks in the program, you will save yourself the time and money that you would have used in outsourcing custom designs.
The bottom line is: Distorting text in Photoshop is a simple process that requires patience and a little know-how. You can distort the text in many ways, making it a useful tool for creating various looks for your designs.
With that in mind, let’s look at how you can apply text distortion in photography using Photoshop.
Step 1\
Start Photoshop, and then click on the File menu. Select the New option and set parameters for your document, according to the space the text is going to occupy in its intended medium. In the Name field, type a name. You can also decide to leave the Photoshop default.
Step 2\
Click the Window menu to open the Layers panel and click Layers.
Step 3\
Click on the New Layer icon that resembles a bent-corner sticky note.
Step 4\
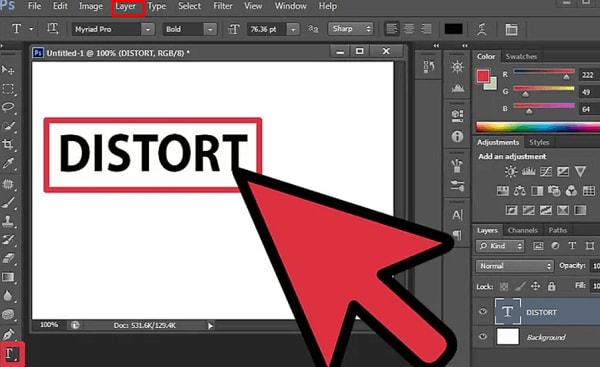
Click on the T icon located in the Tools panel. You can also click on the Window and select Tools if you don’t see the Tools panel. After opening the Type toolbar, choose the text size, color, and font you’ll use for the distorted text. Now, click the canvas, and then type the text you want to distort. The text appears in a non-distorted format when you type.
Step 5\
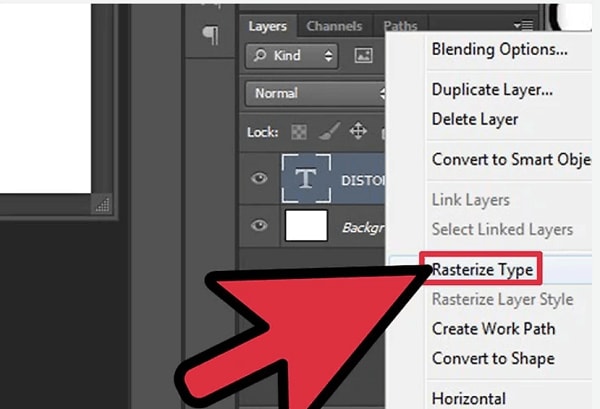
Check the list and right-click on the new text layer with a T icon symbol and the words you have typed. Select the Rasterize Layer option; this will turn the box with the T icon into a white and gray checkerboard.
Step 6\
Click on the Edit menu, then hover your cursor over Transform. From the fly-out menu, choose Distort. A border encircled with white boxes will surround the text on the canvas. Click and pull a corner box away from the text, like toward a corner of the Adobe Photoshop work area.
Be sure to pull it in different directions and check how the text will become funhouse-style elongated in different ways; this will allow you to judge which look you prefer for your text distortion.
Step 7\
Now, click another corner and drag towards the center to make the text look like it’s slightly squished.
Step 8\
Take one of the middleboxes and pull and drug them on either the bottom or top to make the text wider.
Step 9\
Tinker around with different changes mentioned above until you get the text distortion you want. Once you are satisfied with the results, hit Enter to set the change and get rid of the boxes and borders from the text.

Step 10\
Select the File menu and click Save As. Photoshop will automatically have “PSD” displayed in the Format box, which allows you to save your file as a proprietary Photoshop PSD. Make sure you leave this extension, as it lets you re-access the design layers and perform more text distortions in the future. Now, click on Save.

Step 11\
Go to the File menu and click on it. Select the Save As option again. Choose your preferred graphic format and click Save. Photoshop will prompt you about discarding layers. When you see this, click OK or Yes. Doing this will render your text uneditable and allow anyone with an image viewer to open your graphic instead of only Photoshop. It will also allow you to include it in word processing documents, websites, and other materials.
Add Noise to the Text
Select your text and then go to Filter - Noise - Add Noise; this will add Noise to the text. Next, select your text again and go to Filter -Blur -Gaussian Blur; this will blur the edges of the text to help smooth out the distortion.
Make the Text Look like Ink with a Smudge Tool
You can add a texture overlay for more texture and dimension to your text. To do this, click on the Text option in the Toolbox and select the dropdown that says Add Texture Overlay; this opens a new window, and you can click on your image to choose the texture.
How to Distort Text in Video?
Canva is a graphic design platform that offers software for both Windows and Mac. You can use this program to edit photos, videos, and documents. It comes with loads of features that you can use. You can distort texts in video using Canva by following the steps below:
- Head to https://www.canva.com/download/windows/ and download Canva. Install the software on your PC and launch it.
- Click the Create a Design button.
- Select the Custom Size option, and enter the dimensions of choice before clicking the Create New Design button. You can also choose the preset design size options.
- Drag and drop the video into Canva.
- Next, click on Text on the left side menu and choose the Add A Heading option. Enter your text in the box. You can change the size of your text and color.
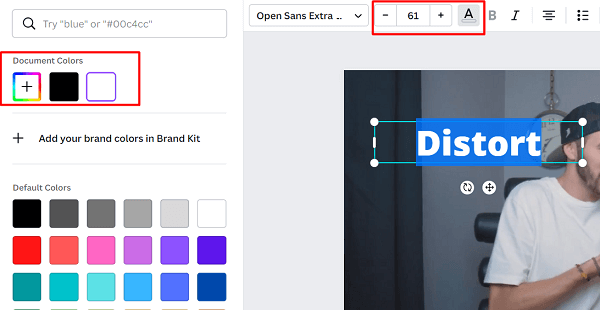
- Next, highlight the text, and then go to Effects. Click on Glitch and Curve. Doing this will allow you to create a curved text with a glitch effect.

- You can download your video with text distortion or share it on your social media platforms.
Bonus! Free Online Text Distorter
You can also distort text with online tools. You need an internet connection and your PC or mobile device to use these platforms. Here are some of the popular online text distorters you’ll find online.
1. PicMonkey
This online tool provides photo editing and graphic design tools, and you can use it to distort the text in your photo. PicMonkey.com allows you to put your words into arcs and circles to create typography art. You can also add drop shadow, and knockout, to outline the center of the distorted text. The handles on both sides of the text box allow you to resize the diameter of the circled text or scrunch up or stretch out your arched text. Additionally, you can add spaces between the letters and play with the kerning of the text.
2.MockoFun
Adding text along a curve is a great way to make a strong graphic statement. The tool lets you create a logo and include a circular distorted text. You can also add this effect to photos using MockoFun.com.
Many graphic designers use this tool to create distorted text on badges, labels, and logos to make their designs cool and attention-grabbing.
3. Zalgo
Zalgo Text Generator is an online tool that allows you to create glitch text. The Zalgo text will be a glitchy form of usual text. Zalgo.org is also free to use this online text distorter.

 NeoDownloader - Fast and fully automatic image/video/music downloader.
4. GFTO
EnGFTO.com is an online text distorter that allows you to choose the text size and color and choose one of the available fonts. It comes with hundreds of text templates. You can also upload fonts, change the text style, and apply gradients. What’s more? Users can add an outline to their text, change the background, and select the color of their text edges.
 Forex Robotron Gold Package
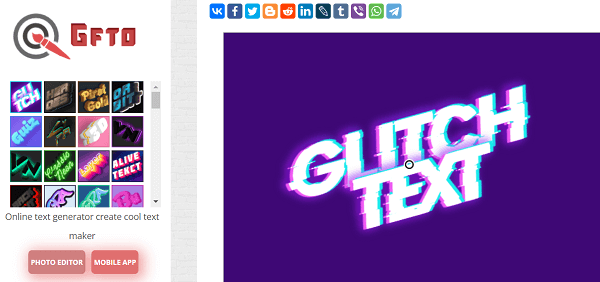
 DLNow Video Downloader
5. Wavy Text Generator
This tool allows you to distort text by adding a wavy effect to it. To use this tool, you only have to head to nhttp://www.coding-dude.com/wp/wavy-text-generator/ and type your text in the field, then this text distorter will generate a preview showing the results of how your text will look like. The pink button allows you to copy your text’s HTML/CSS code.
Conclusion
● Text distortion allows you to create attention-grabbing content. You can use the above tools to create this effect on your text to make it stand out and look more appealing to the audience or viewers.
Over the past few years, distortion effects have become popular. People also apply distortion effects on text to make it stand out. You can use this effect on both video and photography. In this blog post, we’ll look at how to distort the text in photography and video. We have also provided a list of free text distorters.
In this article
02 How to Distort Text in Photography Using Photoshop
03 How to Distort Text in Video?
What Is Text Distortion?
Distortion of text is referred to as the alteration of the original characteristics or shape of a text. Most people use text distortion to add uniqueness to their photos or videos and make sure their projects stand out from the pack.
How to Distort Text in Photography Using Photoshop
If you are looking for ways to combine art and words, Photoshop offers the right tools to help you add creative effects to text. You can apply text distortion to product logos, headers for a blog, or headers you would like to use in other marketing materials to make them stand out.
By typing normal characters and applying changes with a few clicks in the program, you will save yourself the time and money that you would have used in outsourcing custom designs.
The bottom line is: Distorting text in Photoshop is a simple process that requires patience and a little know-how. You can distort the text in many ways, making it a useful tool for creating various looks for your designs.
With that in mind, let’s look at how you can apply text distortion in photography using Photoshop.
Step 1\
Start Photoshop, and then click on the File menu. Select the New option and set parameters for your document, according to the space the text is going to occupy in its intended medium. In the Name field, type a name. You can also decide to leave the Photoshop default.

Step 2\
Click the Window menu to open the Layers panel and click Layers.
Step 3\
Click on the New Layer icon that resembles a bent-corner sticky note.
Step 4\
Click on the T icon located in the Tools panel. You can also click on the Window and select Tools if you don’t see the Tools panel. After opening the Type toolbar, choose the text size, color, and font you’ll use for the distorted text. Now, click the canvas, and then type the text you want to distort. The text appears in a non-distorted format when you type.
Step 5\
Check the list and right-click on the new text layer with a T icon symbol and the words you have typed. Select the Rasterize Layer option; this will turn the box with the T icon into a white and gray checkerboard.
Step 6\
Click on the Edit menu, then hover your cursor over Transform. From the fly-out menu, choose Distort. A border encircled with white boxes will surround the text on the canvas. Click and pull a corner box away from the text, like toward a corner of the Adobe Photoshop work area.
Be sure to pull it in different directions and check how the text will become funhouse-style elongated in different ways; this will allow you to judge which look you prefer for your text distortion.
Step 7\
Now, click another corner and drag towards the center to make the text look like it’s slightly squished.

Step 8\
Take one of the middleboxes and pull and drug them on either the bottom or top to make the text wider.
Step 9\
Tinker around with different changes mentioned above until you get the text distortion you want. Once you are satisfied with the results, hit Enter to set the change and get rid of the boxes and borders from the text.
Step 10\
Select the File menu and click Save As. Photoshop will automatically have “PSD” displayed in the Format box, which allows you to save your file as a proprietary Photoshop PSD. Make sure you leave this extension, as it lets you re-access the design layers and perform more text distortions in the future. Now, click on Save.
Step 11\
Go to the File menu and click on it. Select the Save As option again. Choose your preferred graphic format and click Save. Photoshop will prompt you about discarding layers. When you see this, click OK or Yes. Doing this will render your text uneditable and allow anyone with an image viewer to open your graphic instead of only Photoshop. It will also allow you to include it in word processing documents, websites, and other materials.
Add Noise to the Text
Select your text and then go to Filter - Noise - Add Noise; this will add Noise to the text. Next, select your text again and go to Filter -Blur -Gaussian Blur; this will blur the edges of the text to help smooth out the distortion.
Make the Text Look like Ink with a Smudge Tool
You can add a texture overlay for more texture and dimension to your text. To do this, click on the Text option in the Toolbox and select the dropdown that says Add Texture Overlay; this opens a new window, and you can click on your image to choose the texture.
 Software Update Pro - Check and update software installed on your computer.
How to Distort Text in Video?
Canva is a graphic design platform that offers software for both Windows and Mac. You can use this program to edit photos, videos, and documents. It comes with loads of features that you can use. You can distort texts in video using Canva by following the steps below:
- Head to https://www.canva.com/download/windows/ and download Canva. Install the software on your PC and launch it.
- Click the Create a Design button.
- Select the Custom Size option, and enter the dimensions of choice before clicking the Create New Design button. You can also choose the preset design size options.
- Drag and drop the video into Canva.
- Next, click on Text on the left side menu and choose the Add A Heading option. Enter your text in the box. You can change the size of your text and color.

- Next, highlight the text, and then go to Effects. Click on Glitch and Curve. Doing this will allow you to create a curved text with a glitch effect.
 vMix HD - Software based live production. vMix HD includes everything in vMix Basic HD plus 1000 inputs, Video List, 4 Overlay Channels, and 1 vMix Call
- You can download your video with text distortion or share it on your social media platforms.
Bonus! Free Online Text Distorter
You can also distort text with online tools. You need an internet connection and your PC or mobile device to use these platforms. Here are some of the popular online text distorters you’ll find online.

1. PicMonkey
This online tool provides photo editing and graphic design tools, and you can use it to distort the text in your photo. PicMonkey.com allows you to put your words into arcs and circles to create typography art. You can also add drop shadow, and knockout, to outline the center of the distorted text. The handles on both sides of the text box allow you to resize the diameter of the circled text or scrunch up or stretch out your arched text. Additionally, you can add spaces between the letters and play with the kerning of the text.
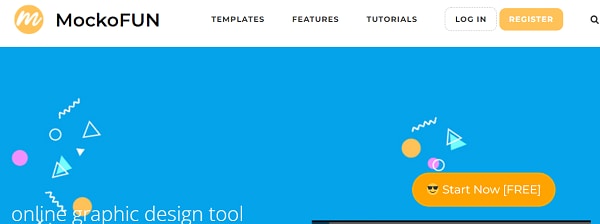
2.MockoFun
Adding text along a curve is a great way to make a strong graphic statement. The tool lets you create a logo and include a circular distorted text. You can also add this effect to photos using MockoFun.com.
Many graphic designers use this tool to create distorted text on badges, labels, and logos to make their designs cool and attention-grabbing.
 Easy GIF Animator is a powerful animated GIF editor and the top tool for creating animated pictures, banners, buttons and GIF videos. You get extensive animation editing features, animation effects, unmatched image quality and optimization for the web. No other GIF animation software matches our features and ease of use, that’s why Easy GIF Animator is so popular.

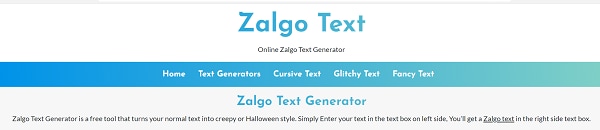
3. Zalgo
Zalgo Text Generator is an online tool that allows you to create glitch text. The Zalgo text will be a glitchy form of usual text. Zalgo.org is also free to use this online text distorter.
4. GFTO
EnGFTO.com is an online text distorter that allows you to choose the text size and color and choose one of the available fonts. It comes with hundreds of text templates. You can also upload fonts, change the text style, and apply gradients. What’s more? Users can add an outline to their text, change the background, and select the color of their text edges.
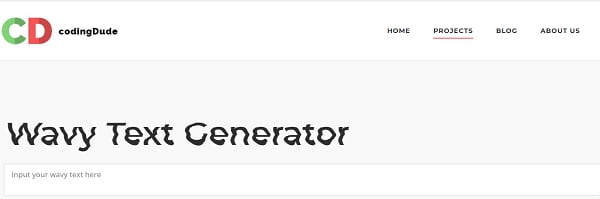
5. Wavy Text Generator
This tool allows you to distort text by adding a wavy effect to it. To use this tool, you only have to head to nhttp://www.coding-dude.com/wp/wavy-text-generator/ and type your text in the field, then this text distorter will generate a preview showing the results of how your text will look like. The pink button allows you to copy your text’s HTML/CSS code.
Conclusion
● Text distortion allows you to create attention-grabbing content. You can use the above tools to create this effect on your text to make it stand out and look more appealing to the audience or viewers.
Over the past few years, distortion effects have become popular. People also apply distortion effects on text to make it stand out. You can use this effect on both video and photography. In this blog post, we’ll look at how to distort the text in photography and video. We have also provided a list of free text distorters.
In this article
02 How to Distort Text in Photography Using Photoshop
03 How to Distort Text in Video?
What Is Text Distortion?
Distortion of text is referred to as the alteration of the original characteristics or shape of a text. Most people use text distortion to add uniqueness to their photos or videos and make sure their projects stand out from the pack.
How to Distort Text in Photography Using Photoshop
If you are looking for ways to combine art and words, Photoshop offers the right tools to help you add creative effects to text. You can apply text distortion to product logos, headers for a blog, or headers you would like to use in other marketing materials to make them stand out.
By typing normal characters and applying changes with a few clicks in the program, you will save yourself the time and money that you would have used in outsourcing custom designs.
The bottom line is: Distorting text in Photoshop is a simple process that requires patience and a little know-how. You can distort the text in many ways, making it a useful tool for creating various looks for your designs.
With that in mind, let’s look at how you can apply text distortion in photography using Photoshop.
 KoolReport Pro is an advanced solution for creating data reports and dashboards in PHP. Equipped with all extended packages , KoolReport Pro is able to connect to various datasources, perform advanced data analysis, construct stunning charts and graphs and export your beautiful work to PDF, Excel, JPG or other formats. Plus, it includes powerful built-in reports such as pivot report and drill-down report which will save your time in building ones.
 It will help you to write dynamic data reports easily, to construct intuitive dashboards or to build a whole business intelligence cockpit.
KoolReport Pro package goes with Full Source Code, Royal Free, ONE (1) Year Priority Support, ONE (1) Year Free Upgrade and 30-Days Money Back Guarantee.
Developer License allows Single Developer to create Unlimited Reports, deploy on Unlimited Servers and able deliver the work to Unlimited Clients.
Step 1\
Start Photoshop, and then click on the File menu. Select the New option and set parameters for your document, according to the space the text is going to occupy in its intended medium. In the Name field, type a name. You can also decide to leave the Photoshop default.
 ZoneAlarm Pro Antivirus + Firewall NextGen
Step 2\
Click the Window menu to open the Layers panel and click Layers.
 PaperScan Professional: PaperScan Scanner Software is a powerful TWAIN & WIA scanning application centered on one idea: making document acquisition an unparalleled easy task for anyone.
Step 3\
Click on the New Layer icon that resembles a bent-corner sticky note.
 Glarysoft File Recovery Pro Annually - Helps to recover your lost file/data, even permanently deleted data.
Step 4\
Click on the T icon located in the Tools panel. You can also click on the Window and select Tools if you don’t see the Tools panel. After opening the Type toolbar, choose the text size, color, and font you’ll use for the distorted text. Now, click the canvas, and then type the text you want to distort. The text appears in a non-distorted format when you type.
Step 5\
Check the list and right-click on the new text layer with a T icon symbol and the words you have typed. Select the Rasterize Layer option; this will turn the box with the T icon into a white and gray checkerboard.
Step 6\
Click on the Edit menu, then hover your cursor over Transform. From the fly-out menu, choose Distort. A border encircled with white boxes will surround the text on the canvas. Click and pull a corner box away from the text, like toward a corner of the Adobe Photoshop work area.
Be sure to pull it in different directions and check how the text will become funhouse-style elongated in different ways; this will allow you to judge which look you prefer for your text distortion.
Step 7\
Now, click another corner and drag towards the center to make the text look like it’s slightly squished.
Step 8\
Take one of the middleboxes and pull and drug them on either the bottom or top to make the text wider.
Step 9\
Tinker around with different changes mentioned above until you get the text distortion you want. Once you are satisfied with the results, hit Enter to set the change and get rid of the boxes and borders from the text.
Step 10\
Select the File menu and click Save As. Photoshop will automatically have “PSD” displayed in the Format box, which allows you to save your file as a proprietary Photoshop PSD. Make sure you leave this extension, as it lets you re-access the design layers and perform more text distortions in the future. Now, click on Save.
Step 11\
Go to the File menu and click on it. Select the Save As option again. Choose your preferred graphic format and click Save. Photoshop will prompt you about discarding layers. When you see this, click OK or Yes. Doing this will render your text uneditable and allow anyone with an image viewer to open your graphic instead of only Photoshop. It will also allow you to include it in word processing documents, websites, and other materials.
Add Noise to the Text
Select your text and then go to Filter - Noise - Add Noise; this will add Noise to the text. Next, select your text again and go to Filter -Blur -Gaussian Blur; this will blur the edges of the text to help smooth out the distortion.
Make the Text Look like Ink with a Smudge Tool
You can add a texture overlay for more texture and dimension to your text. To do this, click on the Text option in the Toolbox and select the dropdown that says Add Texture Overlay; this opens a new window, and you can click on your image to choose the texture.
How to Distort Text in Video?
Canva is a graphic design platform that offers software for both Windows and Mac. You can use this program to edit photos, videos, and documents. It comes with loads of features that you can use. You can distort texts in video using Canva by following the steps below:
- Head to https://www.canva.com/download/windows/ and download Canva. Install the software on your PC and launch it.
- Click the Create a Design button.
- Select the Custom Size option, and enter the dimensions of choice before clicking the Create New Design button. You can also choose the preset design size options.
- Drag and drop the video into Canva.
- Next, click on Text on the left side menu and choose the Add A Heading option. Enter your text in the box. You can change the size of your text and color.
- Next, highlight the text, and then go to Effects. Click on Glitch and Curve. Doing this will allow you to create a curved text with a glitch effect.
 Glarysoft File Recovery Pro - Helps to recover your lost file/data, even permanently deleted data.
- You can download your video with text distortion or share it on your social media platforms.
Bonus! Free Online Text Distorter
You can also distort text with online tools. You need an internet connection and your PC or mobile device to use these platforms. Here are some of the popular online text distorters you’ll find online.
1. PicMonkey
This online tool provides photo editing and graphic design tools, and you can use it to distort the text in your photo. PicMonkey.com allows you to put your words into arcs and circles to create typography art. You can also add drop shadow, and knockout, to outline the center of the distorted text. The handles on both sides of the text box allow you to resize the diameter of the circled text or scrunch up or stretch out your arched text. Additionally, you can add spaces between the letters and play with the kerning of the text.
2.MockoFun
Adding text along a curve is a great way to make a strong graphic statement. The tool lets you create a logo and include a circular distorted text. You can also add this effect to photos using MockoFun.com.
Many graphic designers use this tool to create distorted text on badges, labels, and logos to make their designs cool and attention-grabbing.
 Jet Profiler for MySQL, Enterprise Version: Jet Profiler for MySQL is real-time query performance and diagnostics tool for the MySQL database server. Its detailed query information, graphical interface and ease of use makes this a great tool for finding performance bottlenecks in your MySQL databases.

3. Zalgo
Zalgo Text Generator is an online tool that allows you to create glitch text. The Zalgo text will be a glitchy form of usual text. Zalgo.org is also free to use this online text distorter.
4. GFTO
EnGFTO.com is an online text distorter that allows you to choose the text size and color and choose one of the available fonts. It comes with hundreds of text templates. You can also upload fonts, change the text style, and apply gradients. What’s more? Users can add an outline to their text, change the background, and select the color of their text edges.

5. Wavy Text Generator
This tool allows you to distort text by adding a wavy effect to it. To use this tool, you only have to head to nhttp://www.coding-dude.com/wp/wavy-text-generator/ and type your text in the field, then this text distorter will generate a preview showing the results of how your text will look like. The pink button allows you to copy your text’s HTML/CSS code.

Conclusion
● Text distortion allows you to create attention-grabbing content. You can use the above tools to create this effect on your text to make it stand out and look more appealing to the audience or viewers.
Over the past few years, distortion effects have become popular. People also apply distortion effects on text to make it stand out. You can use this effect on both video and photography. In this blog post, we’ll look at how to distort the text in photography and video. We have also provided a list of free text distorters.
In this article
02 How to Distort Text in Photography Using Photoshop
03 How to Distort Text in Video?
What Is Text Distortion?
Distortion of text is referred to as the alteration of the original characteristics or shape of a text. Most people use text distortion to add uniqueness to their photos or videos and make sure their projects stand out from the pack.
How to Distort Text in Photography Using Photoshop
If you are looking for ways to combine art and words, Photoshop offers the right tools to help you add creative effects to text. You can apply text distortion to product logos, headers for a blog, or headers you would like to use in other marketing materials to make them stand out.
By typing normal characters and applying changes with a few clicks in the program, you will save yourself the time and money that you would have used in outsourcing custom designs.
The bottom line is: Distorting text in Photoshop is a simple process that requires patience and a little know-how. You can distort the text in many ways, making it a useful tool for creating various looks for your designs.
With that in mind, let’s look at how you can apply text distortion in photography using Photoshop.
 EmEditor Professional (Lifetime License, non-store app)
Step 1\
Start Photoshop, and then click on the File menu. Select the New option and set parameters for your document, according to the space the text is going to occupy in its intended medium. In the Name field, type a name. You can also decide to leave the Photoshop default.
 Epubor Audible Converter for Mac: Download and convert Audible AAXC/AA/AAX to MP3 with 100% original quality preserved.
Step 2\
Click the Window menu to open the Layers panel and click Layers.
Step 3\
Click on the New Layer icon that resembles a bent-corner sticky note.
Step 4\
Click on the T icon located in the Tools panel. You can also click on the Window and select Tools if you don’t see the Tools panel. After opening the Type toolbar, choose the text size, color, and font you’ll use for the distorted text. Now, click the canvas, and then type the text you want to distort. The text appears in a non-distorted format when you type.
 vMix Basic HD - Software based live production. vMix Basic HD includes 4 inputs, 3 cameras, streaming, recording, playlist.
Step 5\
Check the list and right-click on the new text layer with a T icon symbol and the words you have typed. Select the Rasterize Layer option; this will turn the box with the T icon into a white and gray checkerboard.
 Any DRM Removal for Win:Remove DRM from Adobe, Kindle, Sony eReader, Kobo, etc, read your ebooks anywhere.
Step 6\
Click on the Edit menu, then hover your cursor over Transform. From the fly-out menu, choose Distort. A border encircled with white boxes will surround the text on the canvas. Click and pull a corner box away from the text, like toward a corner of the Adobe Photoshop work area.
Be sure to pull it in different directions and check how the text will become funhouse-style elongated in different ways; this will allow you to judge which look you prefer for your text distortion.
Step 7\
Now, click another corner and drag towards the center to make the text look like it’s slightly squished.

Step 8\
Take one of the middleboxes and pull and drug them on either the bottom or top to make the text wider.
Step 9\
Tinker around with different changes mentioned above until you get the text distortion you want. Once you are satisfied with the results, hit Enter to set the change and get rid of the boxes and borders from the text.
Step 10\
Select the File menu and click Save As. Photoshop will automatically have “PSD” displayed in the Format box, which allows you to save your file as a proprietary Photoshop PSD. Make sure you leave this extension, as it lets you re-access the design layers and perform more text distortions in the future. Now, click on Save.
Step 11\
Go to the File menu and click on it. Select the Save As option again. Choose your preferred graphic format and click Save. Photoshop will prompt you about discarding layers. When you see this, click OK or Yes. Doing this will render your text uneditable and allow anyone with an image viewer to open your graphic instead of only Photoshop. It will also allow you to include it in word processing documents, websites, and other materials.
Add Noise to the Text
Select your text and then go to Filter - Noise - Add Noise; this will add Noise to the text. Next, select your text again and go to Filter -Blur -Gaussian Blur; this will blur the edges of the text to help smooth out the distortion.
Make the Text Look like Ink with a Smudge Tool
You can add a texture overlay for more texture and dimension to your text. To do this, click on the Text option in the Toolbox and select the dropdown that says Add Texture Overlay; this opens a new window, and you can click on your image to choose the texture.
How to Distort Text in Video?
Canva is a graphic design platform that offers software for both Windows and Mac. You can use this program to edit photos, videos, and documents. It comes with loads of features that you can use. You can distort texts in video using Canva by following the steps below:
- Head to https://www.canva.com/download/windows/ and download Canva. Install the software on your PC and launch it.
- Click the Create a Design button.
- Select the Custom Size option, and enter the dimensions of choice before clicking the Create New Design button. You can also choose the preset design size options.
- Drag and drop the video into Canva.
- Next, click on Text on the left side menu and choose the Add A Heading option. Enter your text in the box. You can change the size of your text and color.
- Next, highlight the text, and then go to Effects. Click on Glitch and Curve. Doing this will allow you to create a curved text with a glitch effect.
- You can download your video with text distortion or share it on your social media platforms.
Bonus! Free Online Text Distorter
You can also distort text with online tools. You need an internet connection and your PC or mobile device to use these platforms. Here are some of the popular online text distorters you’ll find online.
 PDF application, powered by AI-based OCR, for unified workflows with both digital and scanned documents.
 1. PicMonkey
This online tool provides photo editing and graphic design tools, and you can use it to distort the text in your photo. PicMonkey.com allows you to put your words into arcs and circles to create typography art. You can also add drop shadow, and knockout, to outline the center of the distorted text. The handles on both sides of the text box allow you to resize the diameter of the circled text or scrunch up or stretch out your arched text. Additionally, you can add spaces between the letters and play with the kerning of the text.
2.MockoFun
Adding text along a curve is a great way to make a strong graphic statement. The tool lets you create a logo and include a circular distorted text. You can also add this effect to photos using MockoFun.com.
Many graphic designers use this tool to create distorted text on badges, labels, and logos to make their designs cool and attention-grabbing.
3. Zalgo
Zalgo Text Generator is an online tool that allows you to create glitch text. The Zalgo text will be a glitchy form of usual text. Zalgo.org is also free to use this online text distorter.
 Nero Burning ROM:
The ultimate burning program for all your needs!
4. GFTO
EnGFTO.com is an online text distorter that allows you to choose the text size and color and choose one of the available fonts. It comes with hundreds of text templates. You can also upload fonts, change the text style, and apply gradients. What’s more? Users can add an outline to their text, change the background, and select the color of their text edges.
5. Wavy Text Generator
This tool allows you to distort text by adding a wavy effect to it. To use this tool, you only have to head to nhttp://www.coding-dude.com/wp/wavy-text-generator/ and type your text in the field, then this text distorter will generate a preview showing the results of how your text will look like. The pink button allows you to copy your text’s HTML/CSS code.
Conclusion
● Text distortion allows you to create attention-grabbing content. You can use the above tools to create this effect on your text to make it stand out and look more appealing to the audience or viewers.
- Title: [Updated] Captivating Clips Incorporating Text Deformation Artistry
- Author: Mark
- Created at : 2024-07-26 17:46:30
- Updated at : 2024-07-27 17:46:30
- Link: https://extra-lessons.techidaily.com/updated-captivating-clips-incorporating-text-deformation-artistry/
- License: This work is licensed under CC BY-NC-SA 4.0.